

My Modifications
Other Ways to Spend Money
European Spec Ellipsoid Headlights
These headlights are a worthwhile upgrade. The light output is better than the nasty stock sealed beams, and focused better. You also get a better selection of bulbs with the H1 type that these use. For more details on installing these, click HERE.
![Old [left] vs. new [right]](images/my318is/mod/eurolight/bmw001.jpg)
![Old [left] vs. new [right]](images/my318is/mod/eurolight/bmw002.jpg)
![Old [left] vs. new [right]](images/my318is/mod/eurolight/bmw003.jpg)
ApexCone 35W 4500K HID Kit
This modification is a pretty good upgrade. A proper installation takes a reasonable amount of work, but the result is a reliable, safe lighting system. I recommend that you obtain the relay harness that cna be bought with these HID kits and wire it in properly. The start-up current draw of the ballasts can be a bit much for the stock E30 wiring, and a lot of the reliability problems people have with these kits are probably due to shoddy installation. It is also a good idea to keep the ballasts as far from the exhaust as possible, and in places where cool air can flow past them. Do not use 55W kits. They are obnoxiously bright and will blind other drivers. You must also use these with projector type headlights ONLY! The Euro & US-sped ellipsoid headlights seem to work well with these, and project a safe pattern. You can find some installation details HERE.
![Old [left] vs. new [right]](images/my318is/pic/hidinst/bmw001.jpg)
![Old [left] vs. new [right]](images/my318is/pic/hidinst/bmw006.jpg)
![Old [left] vs. new [right]](images/my318is/pic/hidinst/bmw010.jpg)
![Old [left] vs. new [right]](images/my318is/pic/hidinst/bmw011.jpg)
![Old [left] vs. new [right]](images/my318is/pic/hidinst/bmw017.jpg)
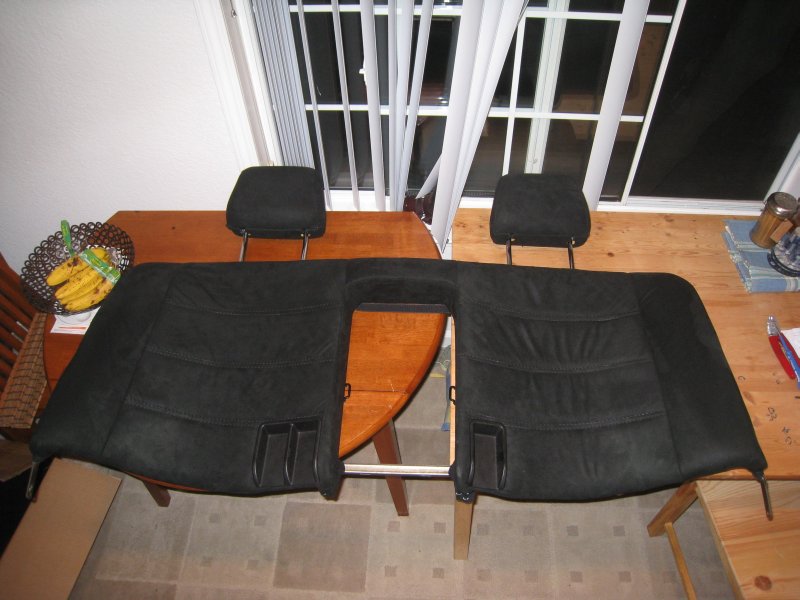
Rear Head Rests
I waited a couple years to find the parts for this in good, clean condition. Adding these always appealed to me as it would make riding in my car far more enjoyable for my friends, and thus much more enjoyable for me. Installation was a breeze, and they look great. I got all the needed parts for $60 from a fellow enthusiast. If you are curious about how to install some for yourself, look no further than HERE.
A writeup for installing these can be found HERE.
![Old [left] vs. new [right]](images/articles/rrest/bmw001.jpg)
![Old [left] vs. new [right]](images/articles/rrest/bmw010.jpg)
![Old [left] vs. new [right]](images/articles/rrest/bmw016.jpg)
![Old [left] vs. new [right]](images/articles/rrest/bmw017.jpg)
LaminX Headlight/Foglamp Protectors
After purchasing the Euro Spec headlights and a new pair of fog lights, I decided that I did not want to let rocks destroy them. Rocks had been the demise for 2 sets of lights before this, and I was done replacing them. I purchased all of the covers for $40 from www.lamin-x.com. These covers are 40mils thick and made from polyethylene cutouts. They should stop any minor damage from rock chips. I am pleased with them so far, and they will be on any headlights that I care about.
European Front Grilles
I purchased a pair of Euro style grilles with my lights. These have an "eyebrow" built into them that adds a slightly more agressive look to the front of the car. In the pic below, the difference can be seen between the US grille [top] and the euro one [bottom].
![Old [left] vs. new [right]](images/my318is/mod/eurogrille/bmw001.jpg)
OEM Skid Plate
After breaking my oil pan 10 miles from cell phone service, I invested in one of these units. It cost $210 and took a lot of effort to install. The included hardware is utterly useless, and I needed to buy some crush nuts. Some drilling into the front crossmember was required, and a MIG welder was very useful to make some custom fixturing to install the crush nuts. Installation is not easy, and should only be tried by confident DIY'ers.
BMW Business CD Player (Blaupunkt CD43) Hybrid
I wanted a factory CD player in the car. The Blaupunkt CD43 is the only viable option. However, it lacks a lot of features, skips when I drive on rough roads and gets terrible radio reception (due to the E30 using a different antenna setup than the CD43 was designed to use). My solution to this was to mate the CD43 faceplate to a JVC KD-HDR60 head unit. It was a ton of work using a PIC microcontroller and some service manuals for the head units, but the result was well worth it! The user interface (menu structure) is fairly similar to that of the JVC head unit, and some clever remapping of the CD43 faceplate keys was necessary through the PIC microcontroller firmware. I would like to think that this is one of the more "over the top" E30 audio modifications out there.

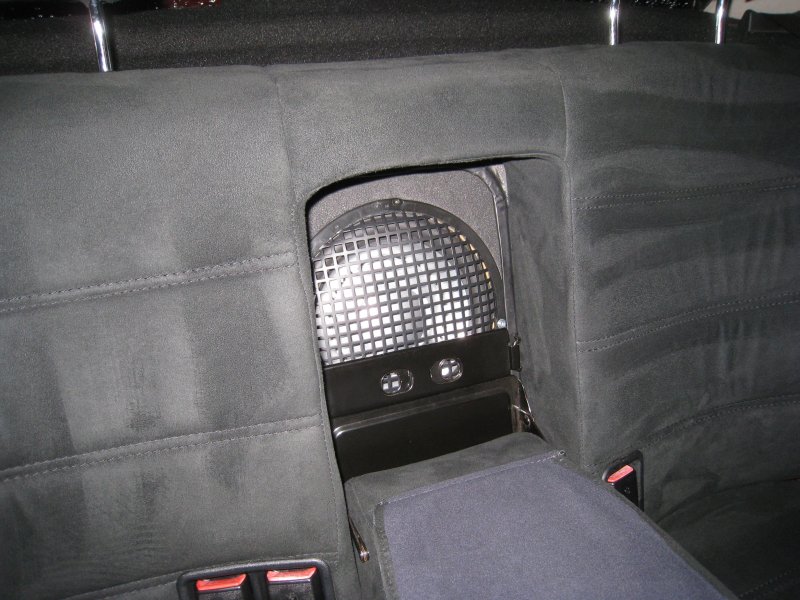
Custom Sound System
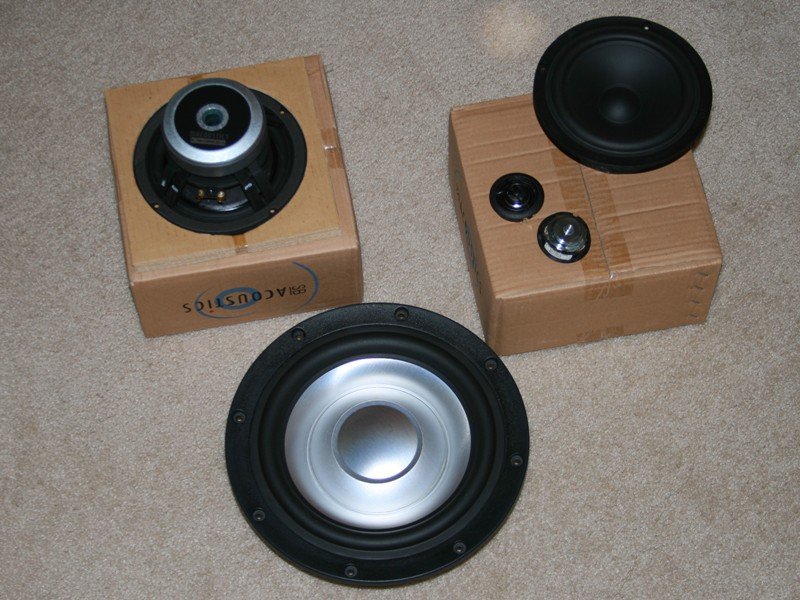
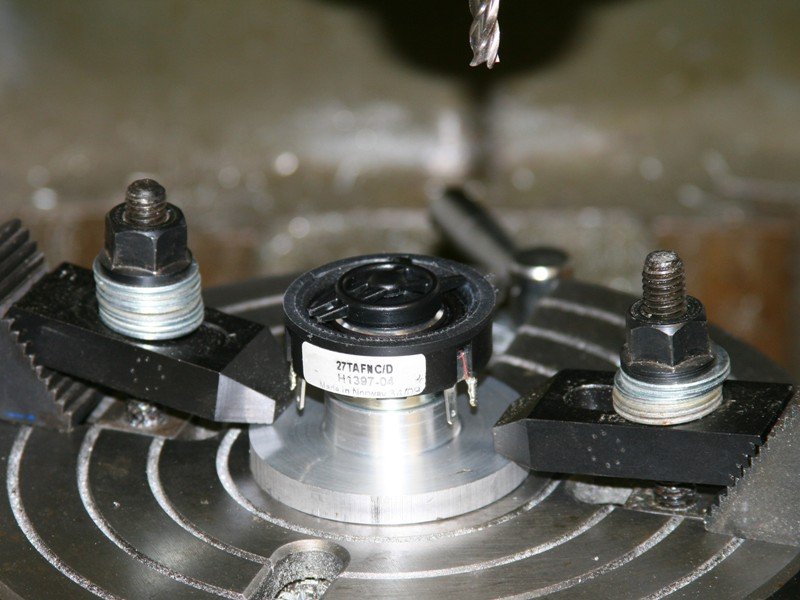
A major goal for the car was to have a nice sound system for long drives. After months of planning, I decided to install an actively crossed over 3-way system. It uses an Audio Control LC6i line level converter, an Audio Control 6XS adjustable active crossover and an MB Quart 5 channel amplifier with a host of custom modifications to its electronics. Sound is transduced by a 10" SB Acoustics SW26DAC76-4 subwoofer mounted in the ski pass-through, 7" SB Acoustics SB17NRXC35-4 in the front kick panels and 1" Seas Prestige 27TAFNC/G tweeters in stock tweeter pods. Yes, these are "home audio" drivers. I have a pretty low opinion of "car brand" stuff, but I won't go into that here. Enjoy the pictures!

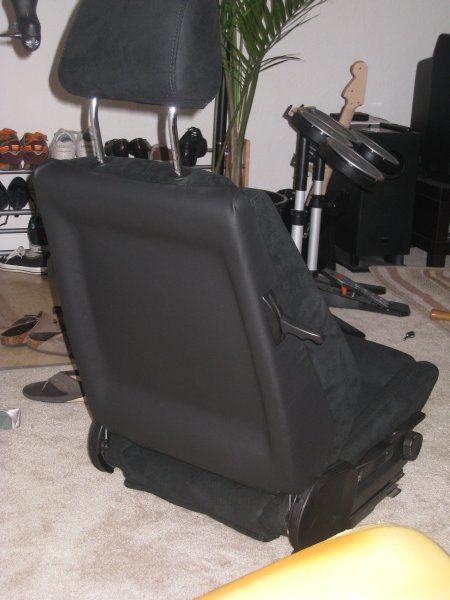
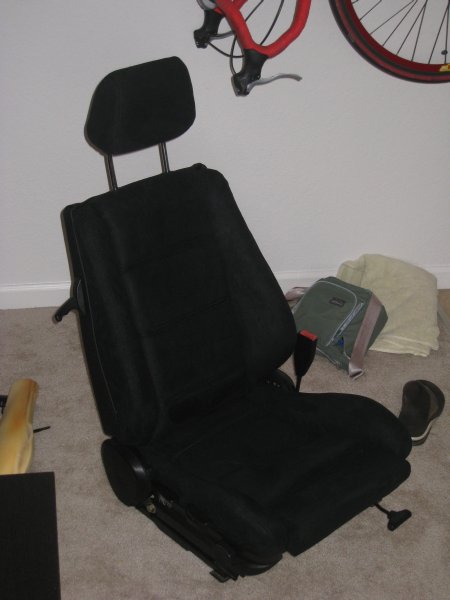
Micro-Suede Upholstery Replacement
The stock vinyl seats were very uncomfortable, and starting to rip. I purchased a full upholstery set from a member on some BMW forums (owner of a company called Creative Options). I stripped all of the old stuff off and attached the new pieces. The material is a synthetic suede leather, and it is dangerously comfortable! This did wonders for the interior, and got rid of the characteristic old German car smell.
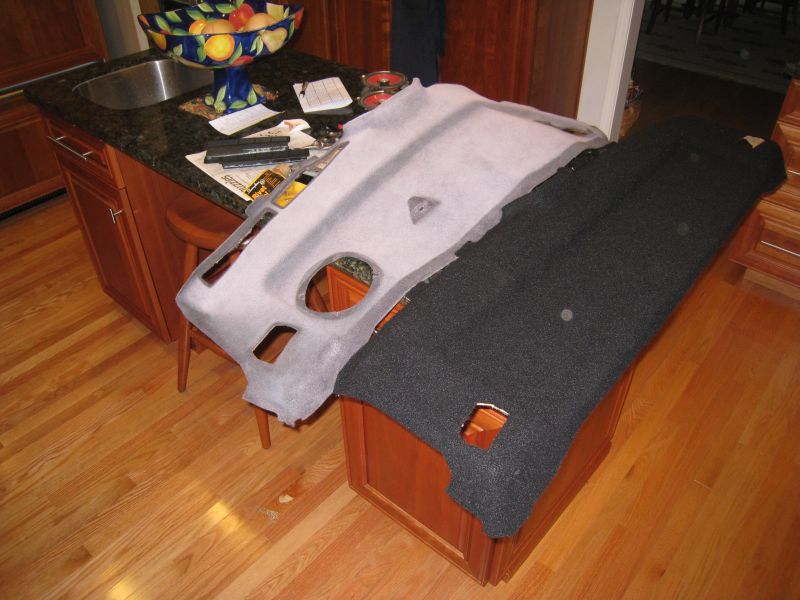
Re-Carpeted Rear Deck
The carpeting on the rear deck was pretty faded, and I wanted to cover the speaker holes since they were no longer in use. I purchased some black speaker carpeting from Parts Express and some upholstery adhesive from RAAM Audio. The speaker holes were filled with 22ga Aluminum sheets. All the original material was removed, and the new stuff was installed. This provided a worthwhile improvement in appearance.

13 Button OBC
A fun little addition to the car was a 13 button OBC from a wrecked 325i. The OBC and harnesses cost about $20, and the coding plug (which had to be special ordered) was $65. This was never a factory option for the 318iS, as far as I know. I am not sure why a coding plug was made for the car if it wasn't an option, but I am glad that they [BMW]] did!
OEM Rear View Mirror with Map Light
This was a lucky eBay find. For $70 shipped, I got this somewhat uncommon factory option for my car. The stock mirror needed to be replaced because the summer heat had caused some of the adhesive behind the glass to bubble out, and it looked awful. This was a fun way to replace that.
OEM Illuminated Shift Knob
As part of my continuing quest to track down obscure (and overpriced) factory options for the car, I obtained a new illuminated shift knob. This really is not worth the price one has to pay for it, but it is a pretty neat addition none the less. The kit I purchased included all the factory wiring harness bits and installation was a breeze. I just couldn't resist the novelty factor here!
Sound Deadening
Once I had finished restoring the suspension to a proper stock condition, I took the next step in improving ride comfort by adding sound deadening to the interior of the car. I stripped out about 25lbs of the original tar material, and added roughly 55lbs of Damplifier sound mat (2.5mm butyl rubber compound backed with 6 mil aluminum foil) and closed cell foam. This stuff went on the floor pan, doors, rear quarter panels, sunroof lid, rear seat area and the back sides of all trim & console panels. It made a huge difference in terms of ride quality. The biggest difference came from applying this to the doors. On the highway, you almost cannot hear a vehicle next to you. All in all, 2 weeks of finger-slicing labor and sweat were well worth it.
Omega Research REC-43T Keyless Entry
After I rebuilt my driver's side door lock, I decided that it owuld be nice to avoid wearing it out again. The Omega REC-43T keyless entry module has been popular with E30 enthusiasts for quite some time now, so I used that. It is about $30 and is as simple as can be. Installation takes about one hour. It lets you remotely lock and unlock the car, and that is all I really needed. The modules that have starter disablers, window controls, headlight flashers and alarms just seem like way too much work to me!
Under-Hood Cleanup/Painting
As much as I liked the look of an engine half-painted with Cosmoline and grease all over, I decided to tidy things up under the hood. I removed & painted the valve cover, AFM, throttle body, intake manifold and oil filter cover black. This gave a neater appearance than dirty Cosmoline & oil buildup.
Blacked Out Kidney
I felt that the front of the car would look much cleaner with a black grille rather than the stock chrome one. It helped the appearance in my opinion. I also painted the headlight retaining rings black.