


Installing ApexCone 4500K HID Lights
Abstract
This is what could be considered one of the lesser-known modifications. Although it is widely heard of, few actually attempt to install a kit themselves. It is a tricky process requiring cutting and new connections, but the return is well worth it. This step by step guide should help anyone considering the ApexCone H1 kits.
Tools
Electric Drill
3/4" Diameter Drill Bit + Assorted Smaller Ones
Electrical Terminal Crimpers
Needle-Nosed Pliers
Required Parts
(Pre-Existing) Headlights Accepting H1 Type Bulb
ApexCone H1 HID Kit
Female 1/4" Spade Receptacle (Shrouded Kind)
Procedure
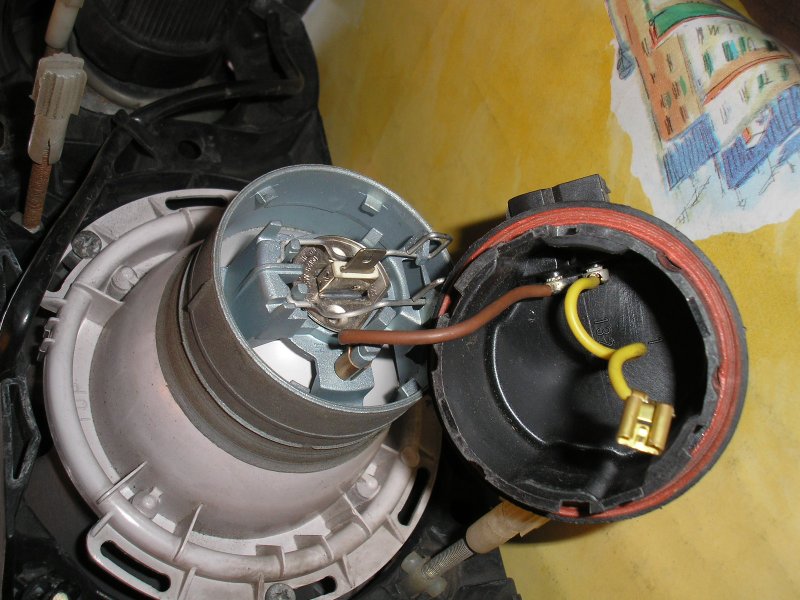
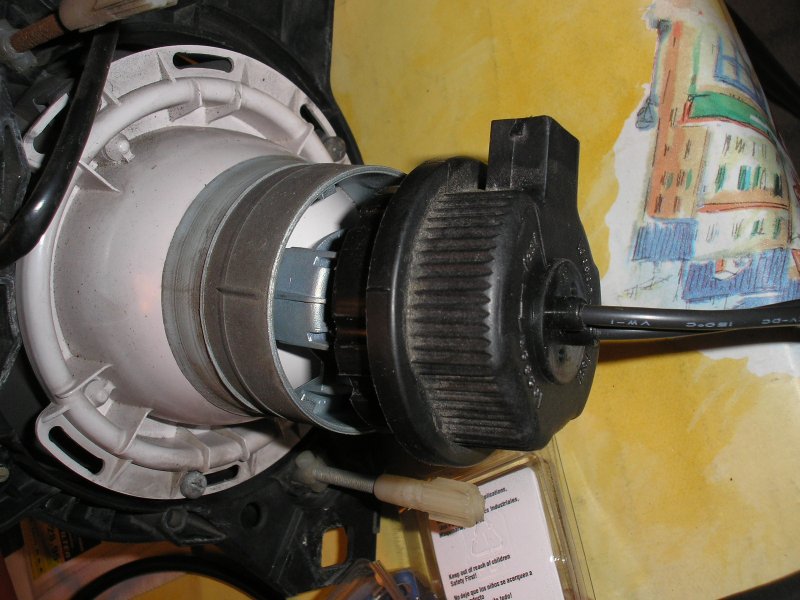
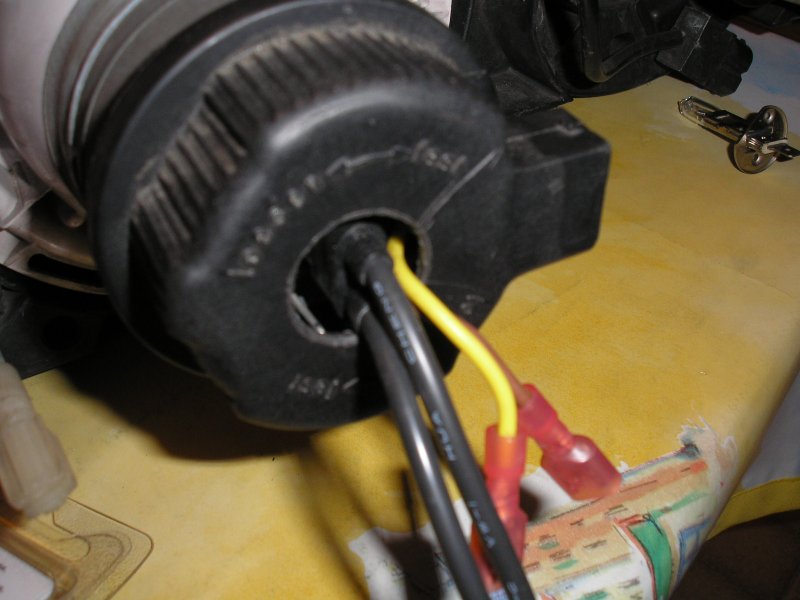
First, remove the rear caps of the headlights. Some needle-nosed pliers should have the circular connector attaching the brown wire off quite easily (I was able to do it by hand). You will need to crimp-on spade connectors where needed to the wires inside the housing. Note, this is only necessary if you wish to continue using this housing. Otherwise, you can skip it and install the spade terminals onto the wires on the car after snipping off the original connector. Make SURE to get the red wire hooked up to the positive lead, and the black one to the ground. In the housing, the brown wire is the ground, and the yellow is the +12V source. Again, make SURE that the red wire on the HID's goes to the +12V source, and the black one to ground. If you fail to do so, there is a good chance that your kit may fry! Also make sure you have the female spade receptacles with the plastic shrouding on them for added protection from short circuits.
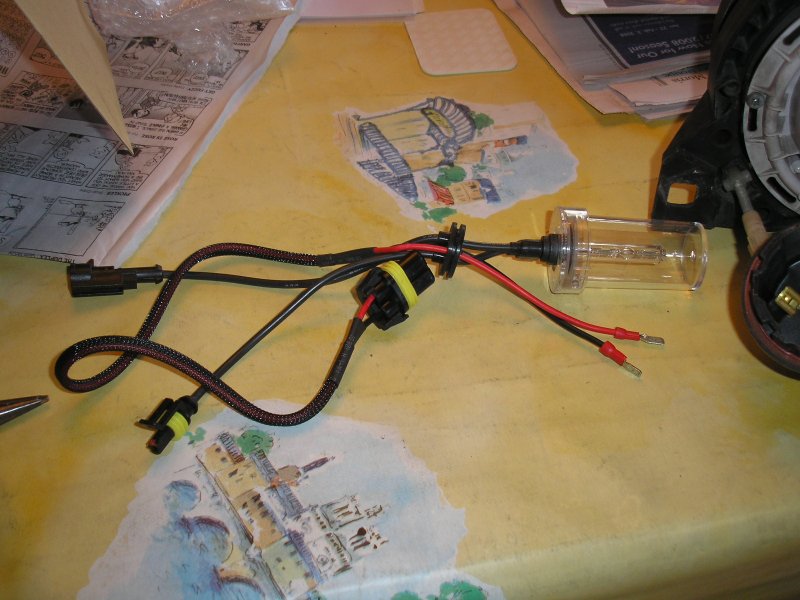

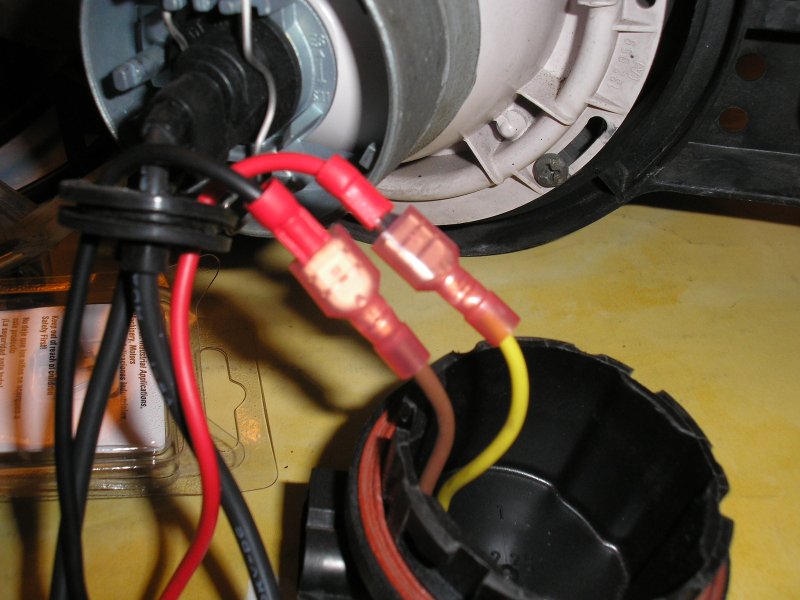
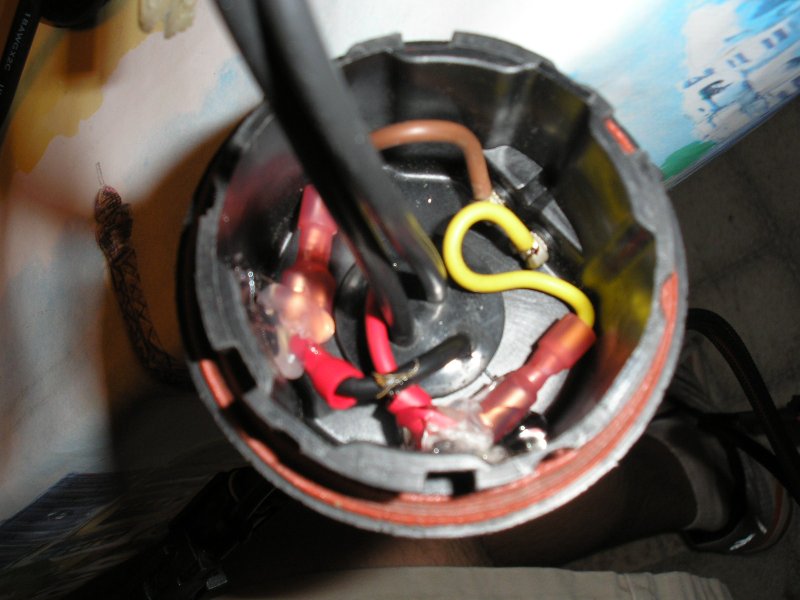
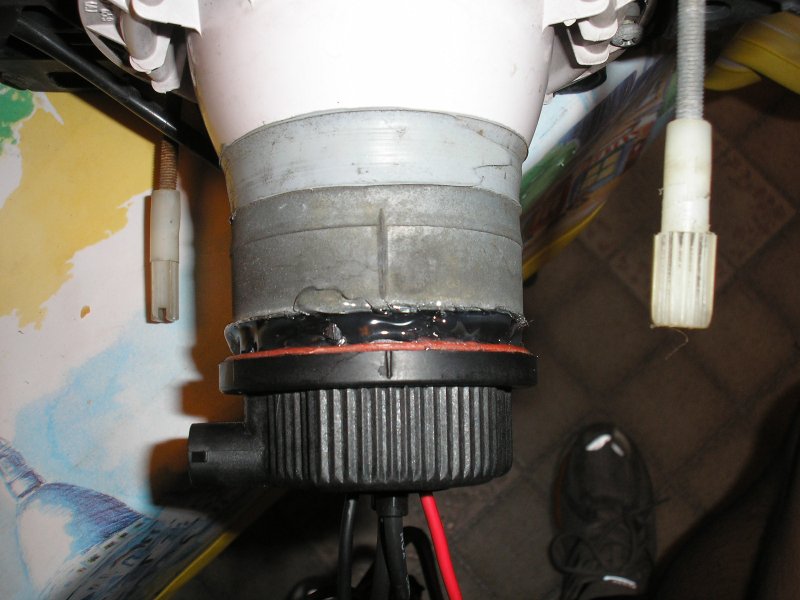
Once you have made satisfactory connections, look at how it must go together. The rubber grommet included with the wiring will need to sit in the back of the cap if you choose to keep it. This will require a 3/4" diameter hole to be drilled in the cap. Start with a small bit and do it in 4-6 steps. This will reduce the chances of shattering the plastic, having something fly around in your hands, and all around makes life easier. Once you have done so, install the grommet in the cap. I opted to hot-glue the spade connections to the inside to prevent them from flopping around. This way, I can continue to use the OEM connectors and have things look tidier.
NOTE:
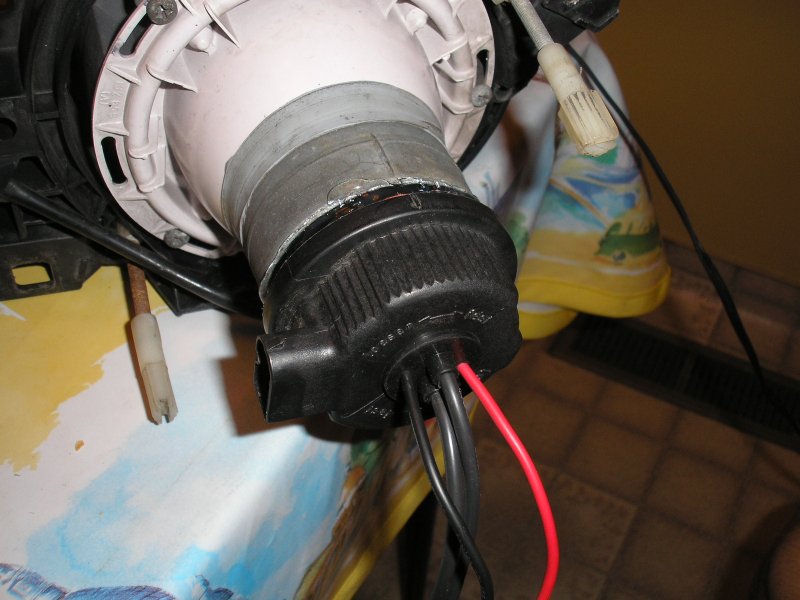
I have re-done the installation since this procedure was written. The newer H1-based bulbs I used do not stick out as far, and the headlight caps can be installed properly. There is no need to do silly things with hot glue, as shown in the pictures below.
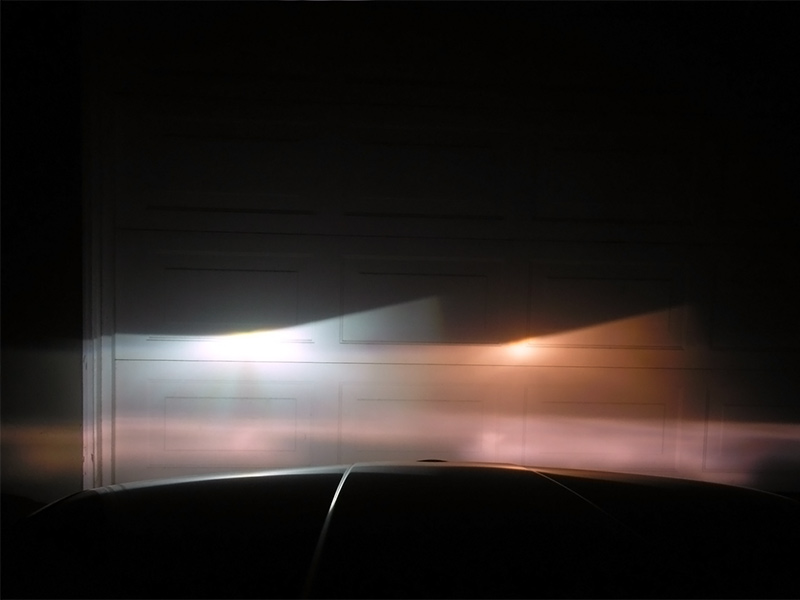
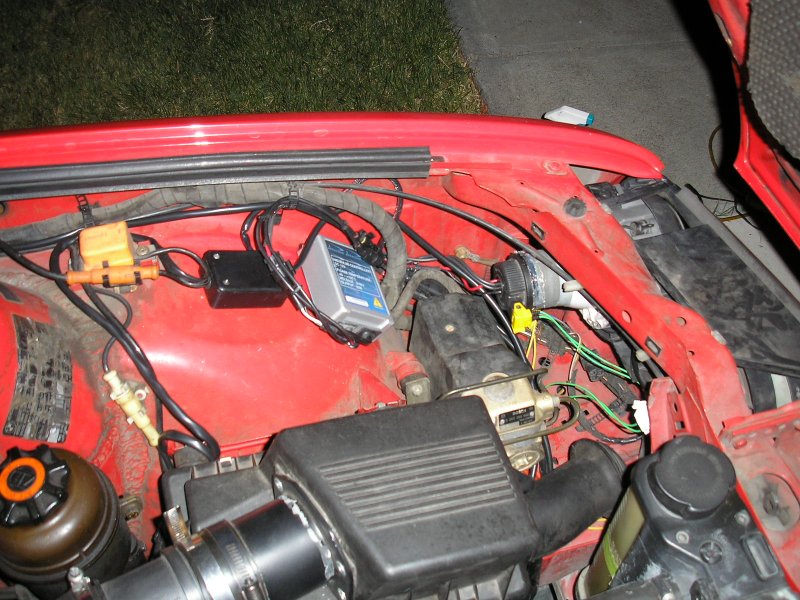
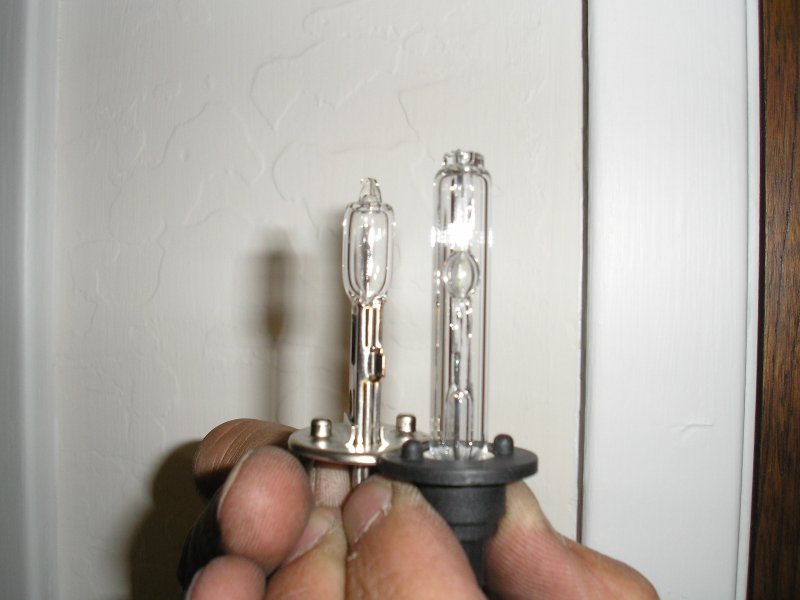
Finally, install things under the hood. The ballasts have adhesive pads on their bottoms, and it is VERY sticky. This can likely cause damage to the paint if you ever wanted to relocate them. Before finalizing anything, make sure the lights work with everything hooked up. If they do, then go ahead and finalize the install. The ballasts are a bit conspicuous, but unless you take the car to shows it will not matter. I also took a picture of the HID bulb next to the original H1 bulb. It looks to me like the light-emission sources are pretty well lined up. It is also evident that things work properly in the picture comparing the output of the two sources below. You must make SURE that you have projector-style headlights before installing HID lights. If you do not, you will be blinding other drivers and become a rolling hazard for everyone else. Do NOT install HID lights on a car without projector headlights!

Update: 11/19/2010
I have reinstalled the HID kit (with a newer one from DDM). Please see the diagram in THIS LINK for an overview of how the kit is wired in. I highly recommend the use of the separate relay for this. Even though the kits claim to have fairly low current draw on start-up, I don't entirely trust them. Do your stock wiring a favor and install a new relay & power wiring!
Conclusions & Results
Although installation can seem a bit hairy, it is well worth it. The light output from this kit is far superior to the original bulbs, and it remains in the same pattern as before. This is crucial to driving safely as it will help to avoid blinding other drivers. Doing that would defeat the entire purpose of this modification.
DISCLAIMER: I take no responsibility (and thus I cannot be held responsible) for damages and/or injuries caused by attempting the procedures outlined on this site. The information provided is to be used at the reader's discretion and all necessary safety precautions requiring emplacement (mentioned or not) are the responsibility of the reader.