


Installing Rear Head Rests
Abstract
A very popular upgrade to most E30's is to install rear head rests. It was a rare factory option, but the needed parts are easily located. Installation can typically be carried out in an afternoon, and there is very little challenge to it.
Tools
10mm Box Wrench
Large Phillips Screwdriver
Craft/Utility Knife or Razor Blade
Required Parts
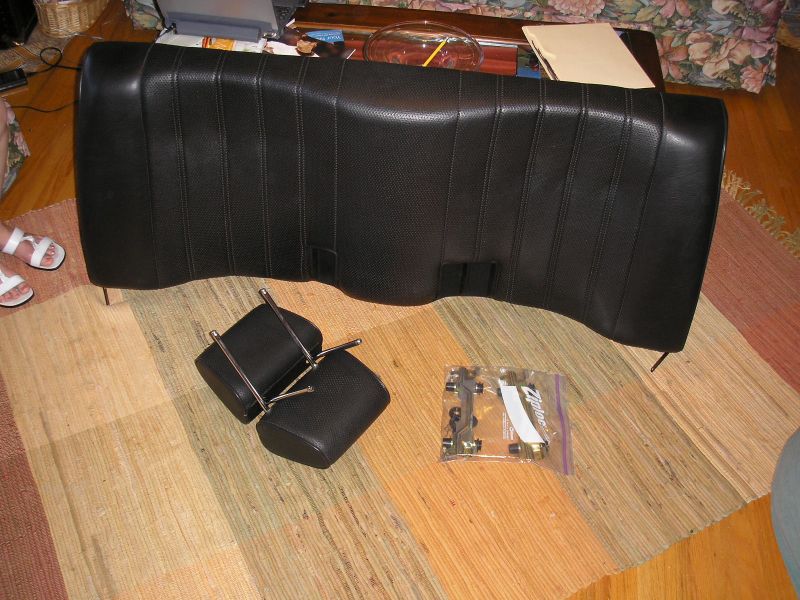
One Pair of E30 Head Rests (from any E30 seats)
Two Rear Headrest Hardware Kits
Procedure
Begin by removing the rear seat (bottom & back). The bottom is removed by pulling up on it to dislodge it from the two posts it sits on. The back has two 10mm-headed bolts securing it at its lower sides. Once those are removed, pull upward on it to remove it from the two hooks folding it. Once the back is removed, move to a clean, well-lit place with lots of room to work.
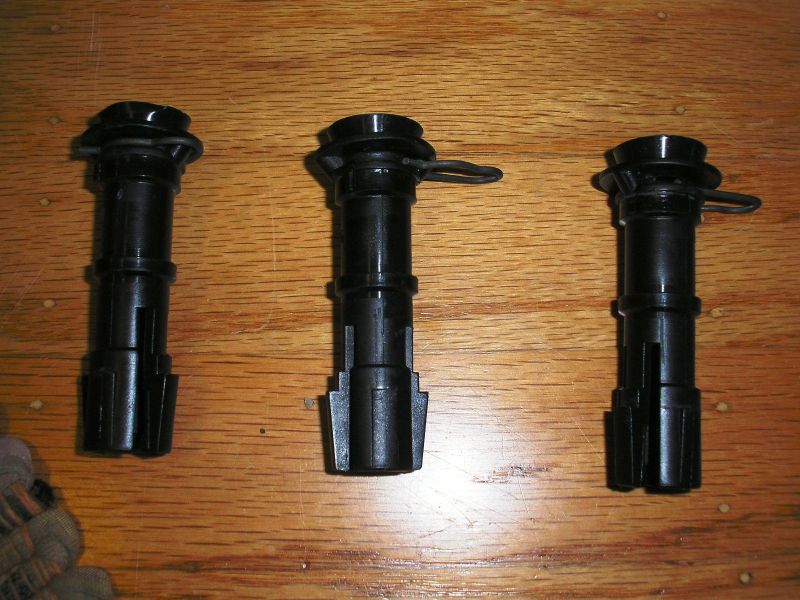
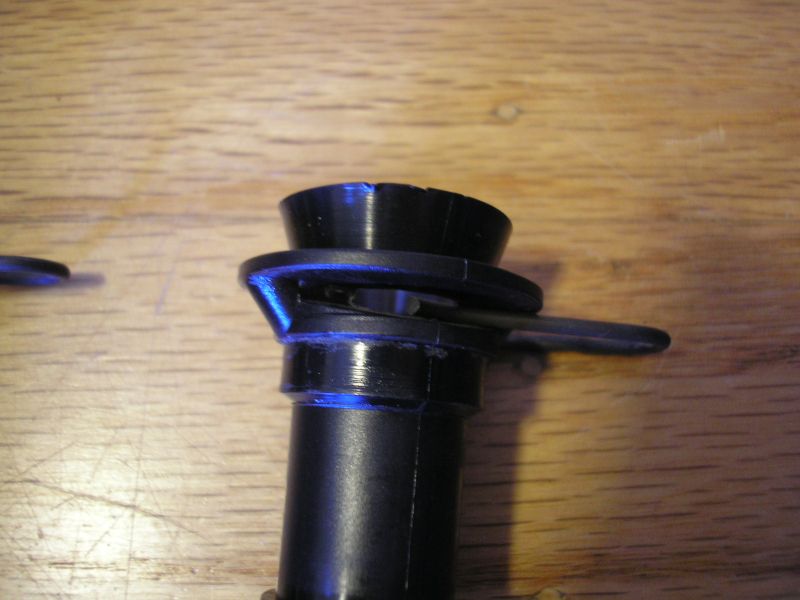
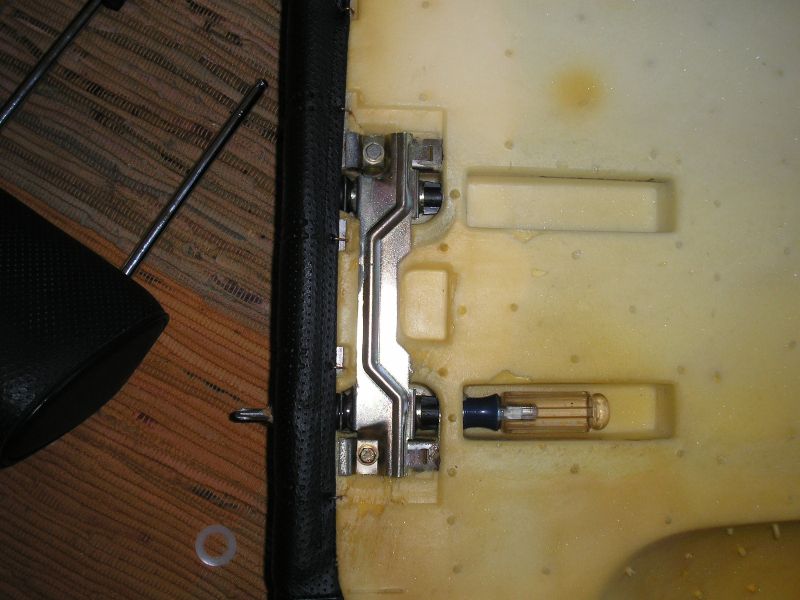
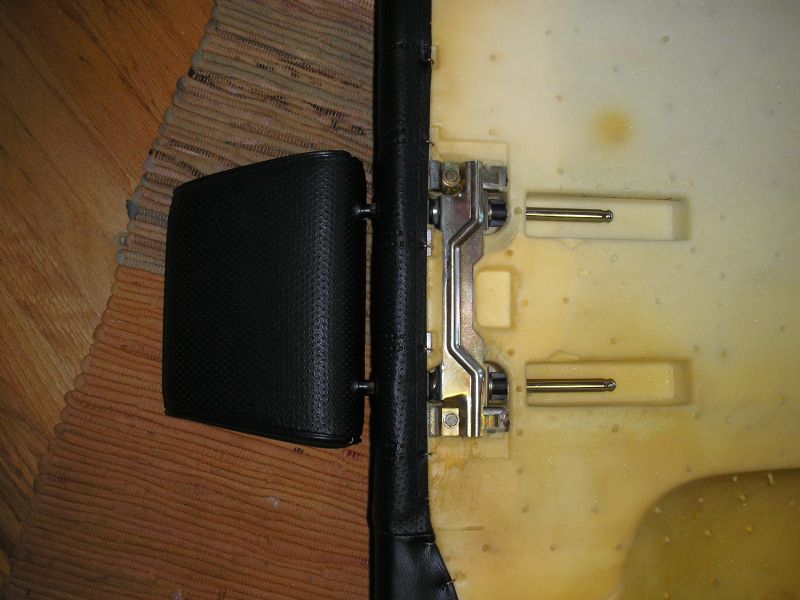
One important, and sometimes frustrating bit to assemble is the sockets in which the head rest rods sit in. The little letal clips are installed as shown. The straight portion of the spring-clips goes over the opening in the sockets, with the convex part matching the shape of the plastic on the other side. Also take note of the exploded and assembled pictures of the parts.

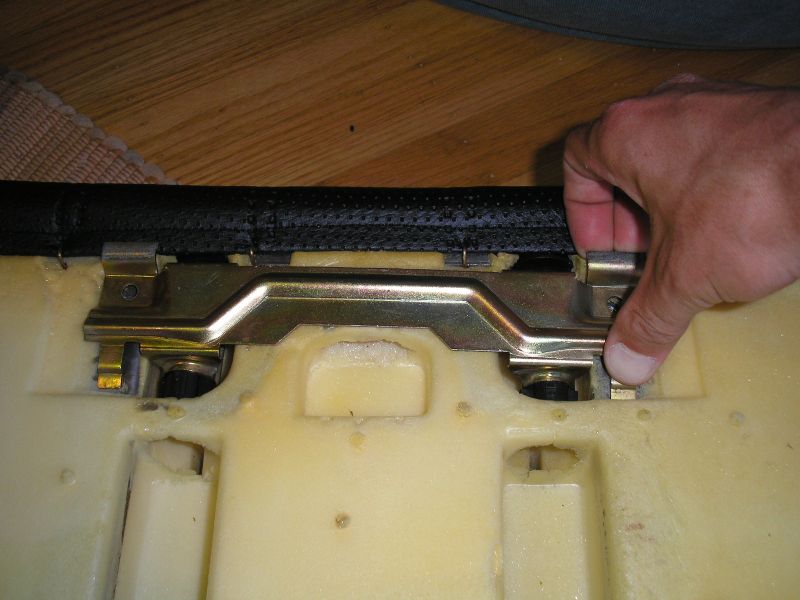
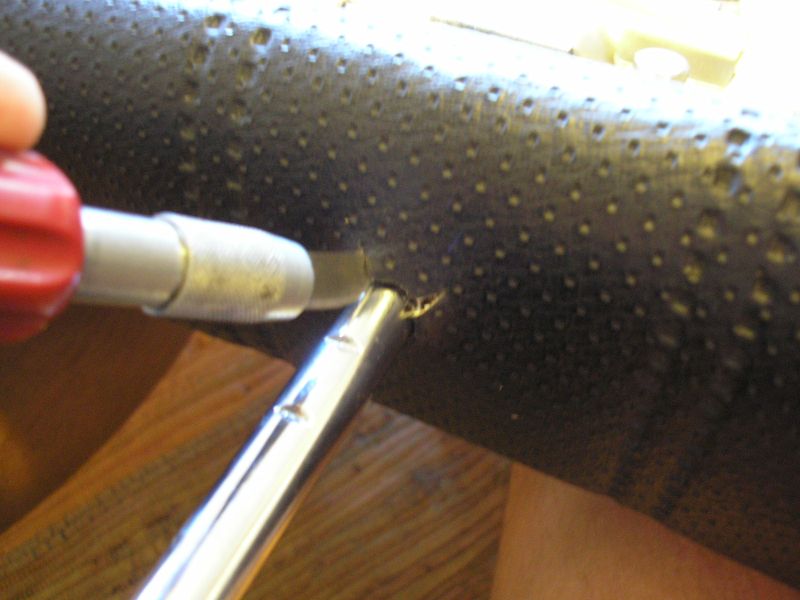
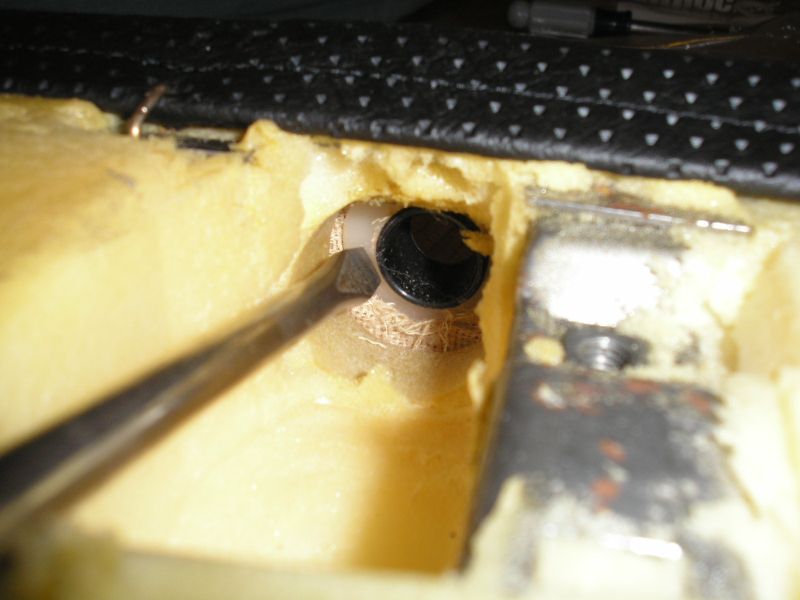
Next, pop the plastic sockets into the metal brackets. Take a good look at the back of the seat where things are supposed ot mount. You will need to scrape off excess foam that may be covering mounting holes and such. Getting the brackets in can be pretty tricky. You will need a little brute force to get both metal tabs into their slots, while making sure not to damage the plastic sockets' tops. I would HIGHLY recommend that you use the fully installed bracket/sockets as guides when putting the holes in your seat back. This is where a large Phillips screwdrivers comes in handy. I pressed it up tight against the vinyl, and used a craft knife on the other side to help it through. THe screwdriver alone might cause an unsightly, and off-center tear.


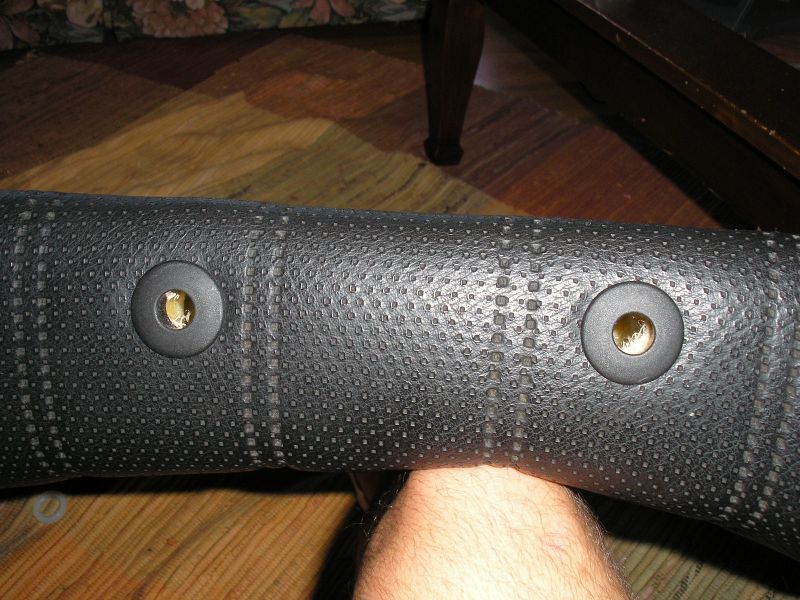
The next order of business is to stick the head rests into the new holes, and into the bracketry. Do so carefully so as not to rip the vinyl accidentally. Also, make sure that the black plastic drommets are on the posts prior to installation. Once in, use the craft knife to make 3 or 4 small incisions around the edges of the post. This will make enough room to install the grommets. Trim the flaps off if you wish as it may help to reduce the chances of the cuts propagating into big rips. The grommets should sit nice and flat in their new holes.

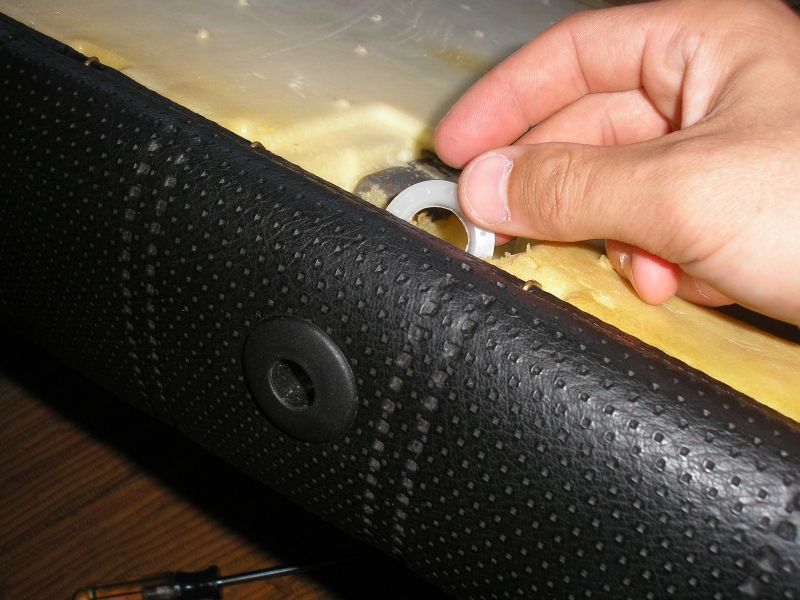
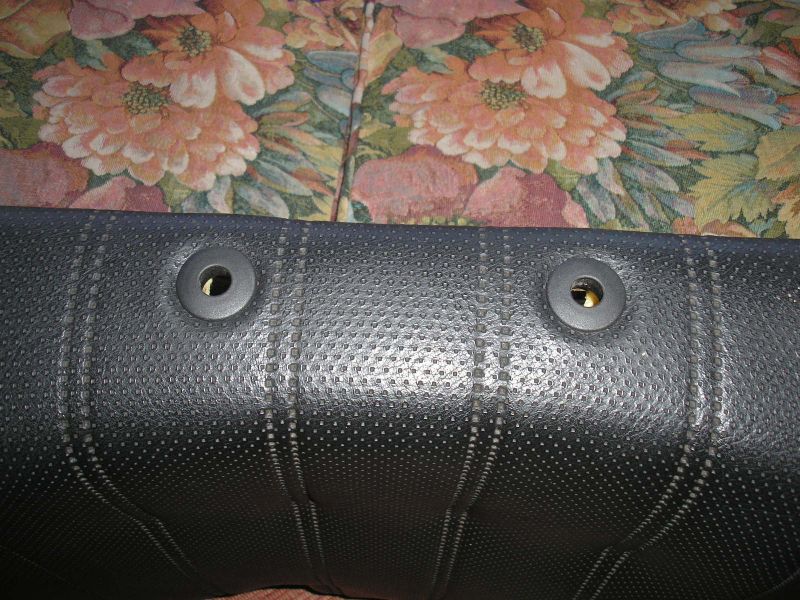
To secure the grommets, grab the white plastic rings. You may have noticed that the grommets were ribbed on the part that passes through the holes in the vinyl. As you may gues, the rings snap onto those ribs up in the seat. You will likely need to remove the brackets you installed earlier to do this properly. Force them on as far as you can without damaging anything, using a screwdriver fro the last couple clicks. This will ensure that the grommmets sit flat and even on the seat back. Once you reinstall the brackets, put it all together and see how it looks. If you need to adjust the holes the grommets sit in, do so now (carefully).
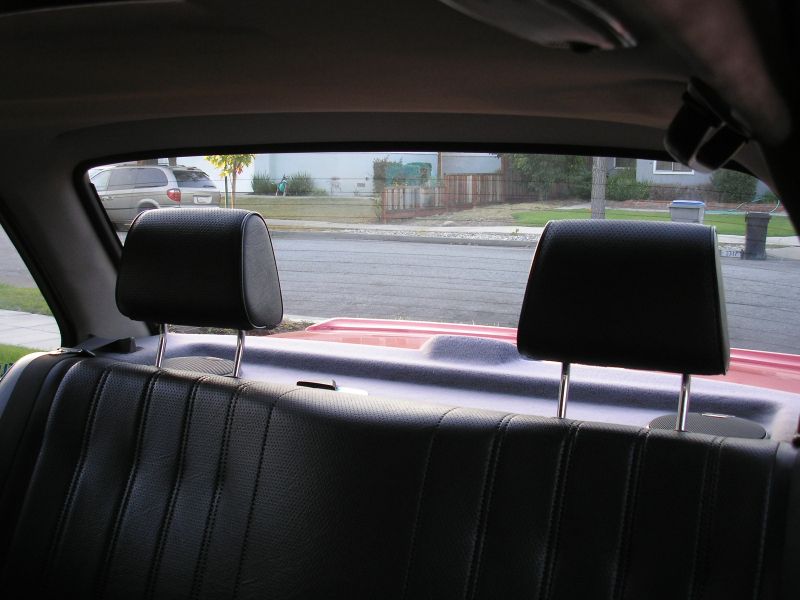
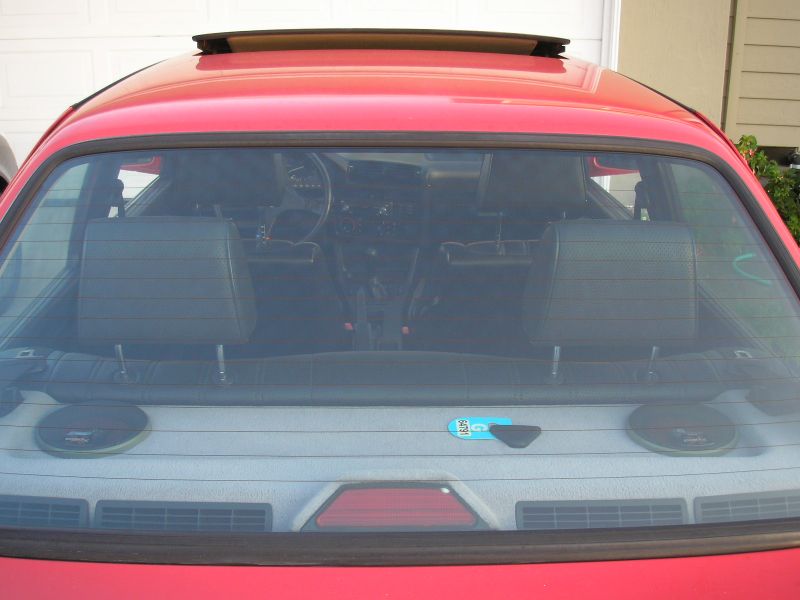
Finally, reinstall the seat back and bottom in the car. I recommend doing so with the head rests installed and pushed all the way down. They will hit the rear window when they are extended up to the highest 2 clicks, and this makes inserting them a pain without worrying about messing up the grommets. Once it is all together again, take a seat in the back and enjoy the head rests! Chances are this will be the only time you as the owner of the car will ever use them yourself!
Conclusions & Results
Your passengers will appreciate the effort you put in to this project. It makes riding in the back a lot more comfortable for anyone wishing to nap on a long drive, and really is quite simple to do. I consider this to be a very worthwhile addition to any E30.
DISCLAIMER: I take no responsibility (and thus I cannot be held responsible) for damages and/or injuries caused by attempting the procedures outlined on this site. The information provided is to be used at the reader's discretion and all necessary safety precautions requiring emplacement (mentioned or not) are the responsibility of the reader.