


Installing an Omega REC-43T Keyless Entry Module
Abstract
Most people would agree that locking and unlocking their car with the push of a button is far more convenient than using the key. This is especially true if your car is twenty years old, and the door lock cylinders are starting to get a bit finicky. If you are in this boat, there is a cheap and simple solution. The Omega Research REC-43T keyless entry module is the perfect item for the job. It adds keyless entry capability to your car, without any fancy bells and whistles. It just works.
Tools
Wire Cutters / Dykes
Wire Strippers
Electrical Crimpers
13mm Box Wrench
Parts
Omega Research REC-43T Keyless Entry Kit
Zip Ties
Electrical Butt Splices
Electrical Tape
Procedure
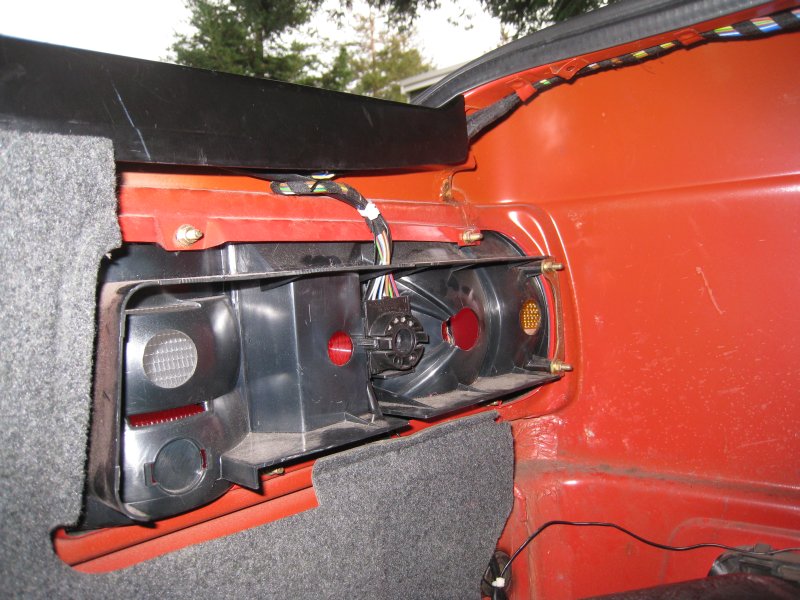
Installation begins by removing the tail light bulb carriers, pulling everything out of the jack storage compartment and pulling the trunk lining out of the way. You should also disconnect the battery's negative terminal. A 13mm box wrench is needed to do that. Work patiently with the lining. It will usually get caught on the metal hooks that hold the main trunk wiring harness. Once it is cleared out of the way, locate the smaller harness that connects to the trunk locking module. You should pull the rear lining out and verify that the set of wires you are working with are in fact the ones that go to the trunk lock before proceeding.
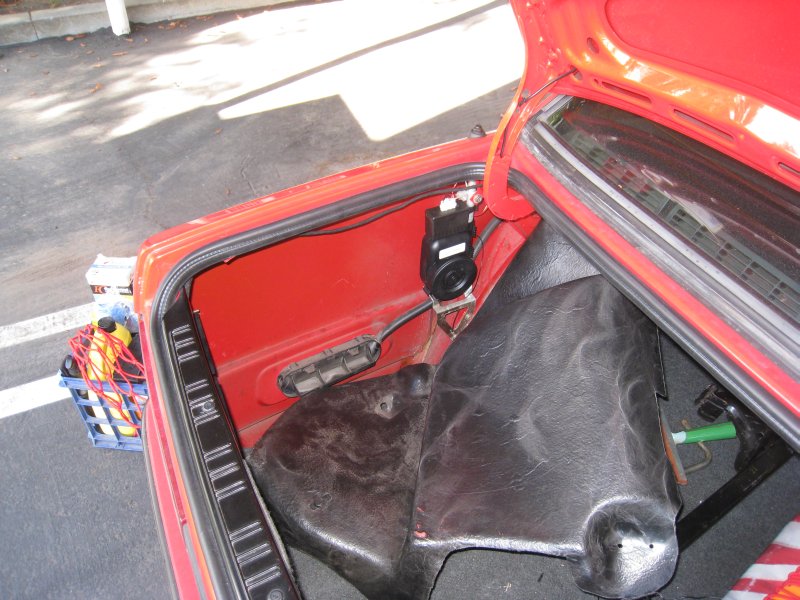
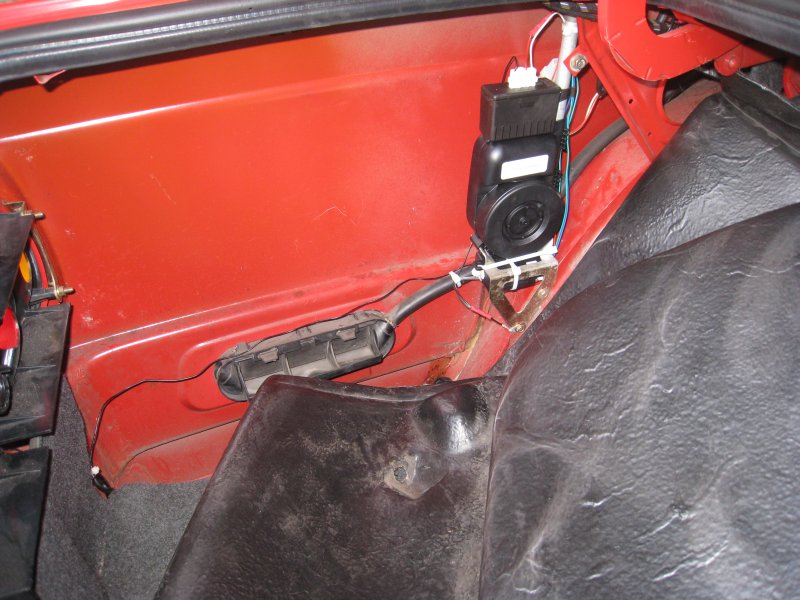
Once you are sure that you have the right harness, you can continue. First, zip-tie the module securely under the power antenna housing. This seems like the cleanest spot to install it, with easy access to all of the wires you will need. Be careful not to put any undue stress on the little electrical connectors on the REC-43T module. Also, be sure to insert the 3-wire cable supplied with it prior to securing it in there. You will be using that one to control the lock / unlock requests.
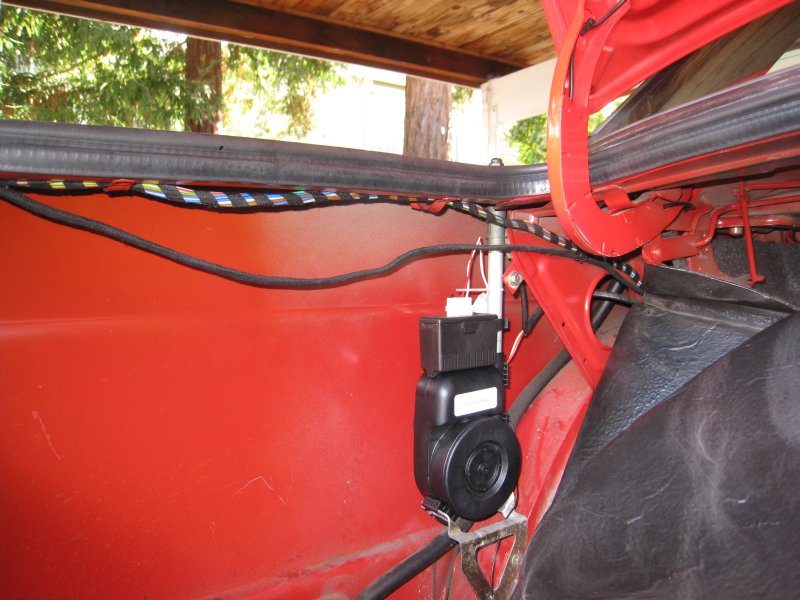
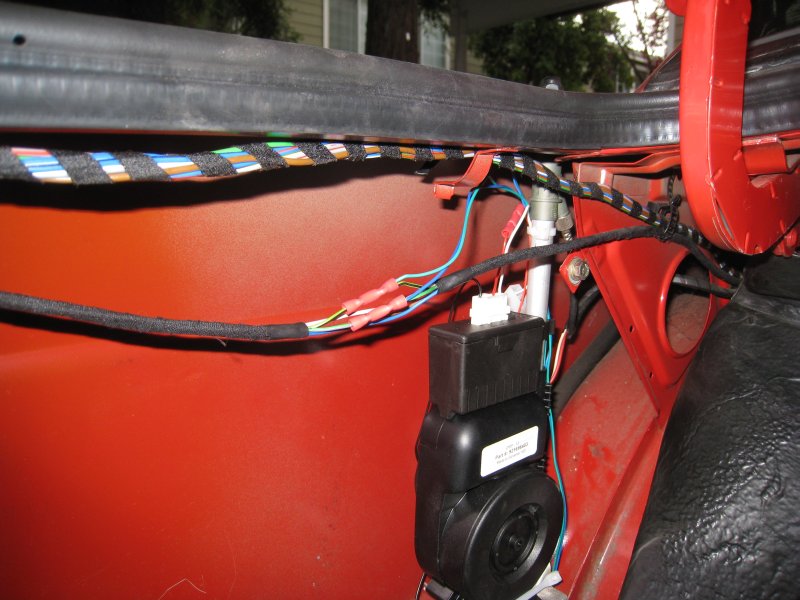
The red wire in the four wire cable needs to be connected to a constant 12V source. I chose to use the power antenna's 12V input since it is hot at all times, and fused (red wire on antenna). Similarly, I connected the black wire (in the four wire cable) to the power antenna's ground (black as well). Tape-off the ends of the green & blue wires that are in the four wire cable; they are not used for anything. I made my connections by cutting the stock wires, twisting the new and old ones together and joining them with 18-22ga crimpable butt splices.

This next part is the important one. Cut away about 5" of the black tape covering the trunk lock harness. Use some electrical tape on the ends to keep it from unravelling further. Find the green/violet and green/black wires. Cut them in the middle of the exposed length and strip about 0.25" of insulation off of all ends.
Route the 3-wire cable from the REC-43T module over to this section and strip 0.5" of insulation from the ends of the green and blue wires. Twist the green wire from the REC-43T together with one end of the green/black wire. Join this new bundle to the other end of the green/black wire with a crimped butt splice. Do the same for the blue wire from the REC-43T and the green/violet wire. Wrap the butt splices and other wires in the harness with a short length of electrical tape, just to hold them together. Put all of the wires back into place on the metal chassis hangers when you are done.
REMEMBER: Do not use the green & blue wires from the four-wire cable. Those are not pre-programmed to do anything. Use the ones on the three-wire cable. It is best to tape-off the ends of the green & blue wires in the four wire cable.

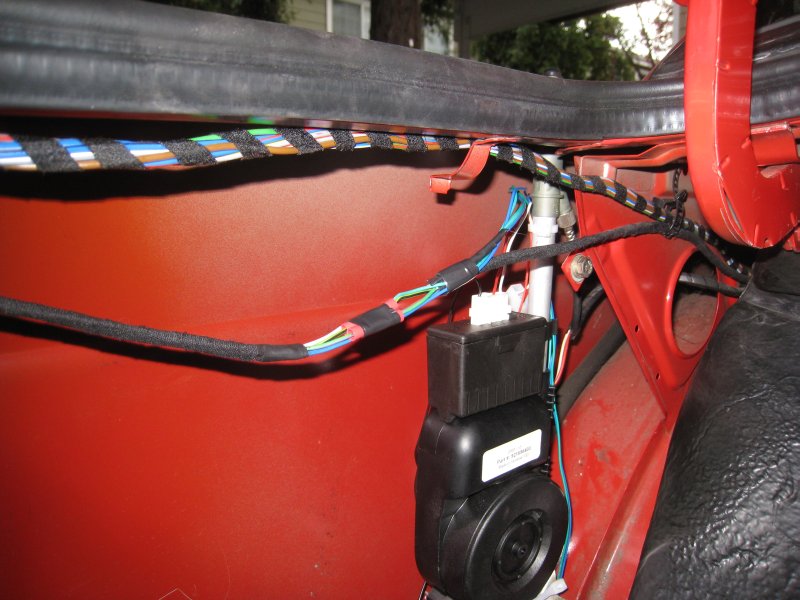
The final order of business is the antenna wire. I routed mine over to the tail light, up behind the electrical connector and out the top. I am not sure how well the metal chassis shields the interior of the trunk from RF signals, but I figured it might be worth the extra effort to get part of the antenna into an RF-transparent spot. If you look closely, you can see the antenna zip tied to the wire harness above the tail light. Do what you want with the antenna, re-connect the battery, test the module and put everything back together. You are all done! If you get poor remote control performance, you might need to experiment with different locations for the antenna wire.
Conclusions
This cheap, simple modification is totally worth it. So far, I have found that the remote can operate the locks from at least 30' away. It has been very consistent, too. It would be nice to have the parking lights flash as a confirmation of lock requests, but that would require a lot more cutting of factory wires, relays and new things being stuffed up inside of the dashboard. That is a lot of work for marginal gains in usability. I highly recommend this little module, and it is well worth the hour it takes to install it.
DISCLAIMER: I take no responsibility (and thus I cannot be held responsible) for damages and/or injuries caused by attempting the procedures outlined on this site. The information provided is to be used at the reader's discretion and all necessary safety precautions requiring emplacement (mentioned or not) are the responsibility of the reader.