Custom Coil-On-Plug Ignition Conversion, Page 2
Another item needing to be addressed was the connector fastening brackets. In their original form, they would be stuck moving down toward the valve cover's bottom when opened. I needed to reverse this so the connectors would be connectable from the top. Using some needle-nosed pliers and dykes, I removed and modified the brackets to accomplish this. By carefully looking at the brackets and the grooves they slide in within the coil body, you can see what needed to be done.
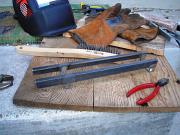
Next on the agenda was devising a way to secure the coil packs on the valve cover. Using some angle iron from a local hardware store I developed a simple bracket. It was ugly, but served its purpose. Some notches were cut into the bracket here and there to make sure the coil packs would fit inside. It was a VERY tight fit when it was all put together. It was so tight that the connectors could not even be put on with the coil packs in place. Due to that, I decided to scrap this idea and start over. Smaller coil packs were necessary, as well as a simpler way of fastening them in place.
Coil packs from the M54 motor were selected as the units for the COP version 2 conversion. They allowed plenty of room for the connector, and even fit in the valve cover without any chopping. The coil for cylinder #1 had to be trimmed a little bit though, as the "passage" in the middle of the cover did not extend all the way through to both ends.
The first generation of the second generation bracket was far simpler than the one developed to work with the stock coil packs. Everything fit perfectly the first time through. You can also see the difference in size between the stock and M54 coil packs.
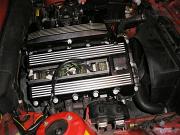
Fitment was a breeze once the bracket was finished. It was secured using some 60mm long M6x1 threaded rod in the holes where the two center valve cover bolts were located previously. A couple sets of washers & nuts were used to secure both the valve cover and the ignition coil bracket.


