


Euro Ellipsoid Headlight Install
Abstract
Notes:
The following write-up is for people converting from sealed-beams to Euro-Ellip's. There may be some slight differences for those with US-Ellip's, but this should still work as I do cover the necessary changes in procedure.
Some Euro Ellipsoid kits do not come with the connectors or caps for the high beam. If these parts are not already present, they will need to be purchased (parts with the * after them).
Tools
Small Flat-Blade Screwdriver
Dykes (Wire Cutters)
Wire Strippers/Crimpers
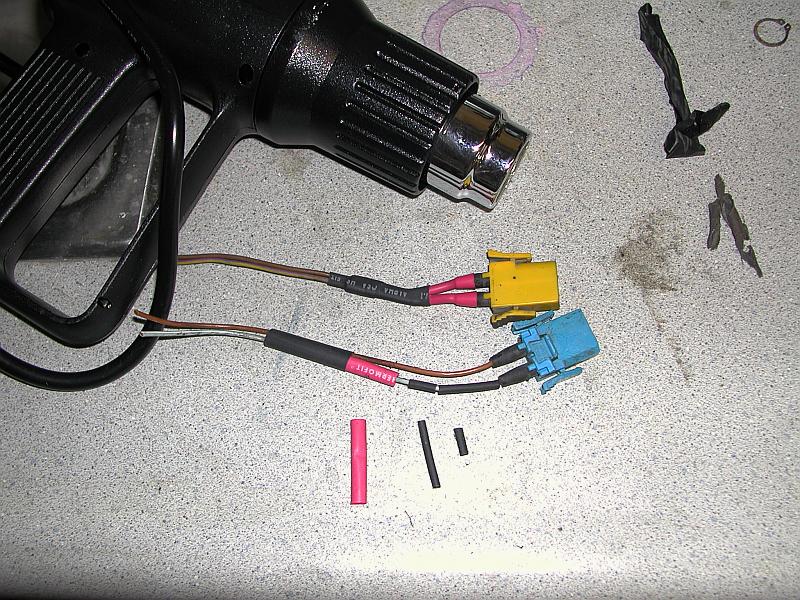
Heat Gun (optional, but recommended)
Required Parts
2 x High Beam Caps* [PN 63-12-1-381-190]
4 x Wire Terminals* (Item #1 in first link below) for City Lights
8 x 90deg Wire Terminals* (Item #3 in first link below) for Hi/Lo Beams
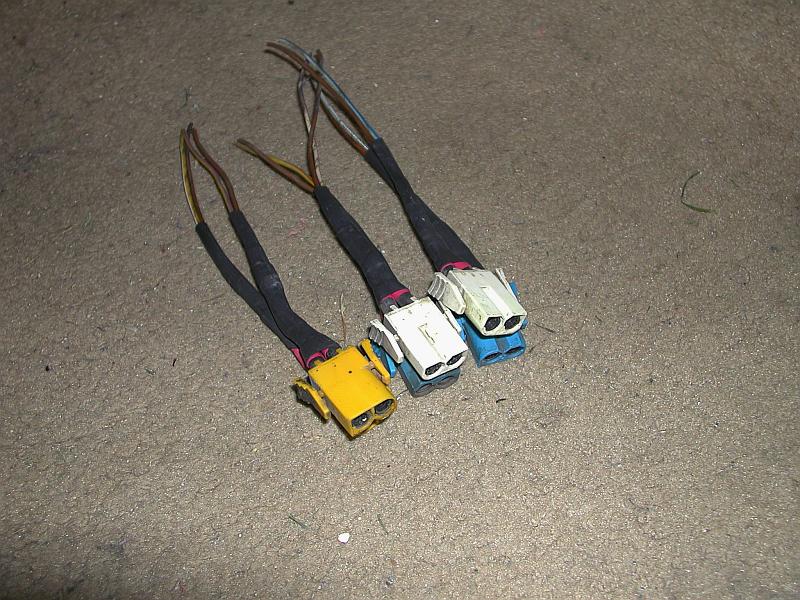
2 x Connector Housing* (Item #5 in second link below) for City Lights
2 x YELLOW Connector Housing* (Item #6 [PN 61-13-1-378-419] in second link below) for Lo-Beams
2 x WHITE Connector Housing* (Item #6 [PN 61-13-1-378-417] in second link below) for Hi-Beams
12 Crimp Splice Connectors for 14-16ga wire
4 pairs of spade connectors (optional)
An assortment of Heat Shrink Tubing (Alternatively you can use electrical tape, it is just messier if you ever change the wiring).
Procedure
The headlight wires are color coded as follows:
Brown - All grounds
White/Blue - Passenger Side High Beam Positive
Yellow/Blue - Passenger Side Low Beam Positive
White/Purple - Driver Side High Beam Positive
Yellow/Purple - Driver Side Low Beam Positive
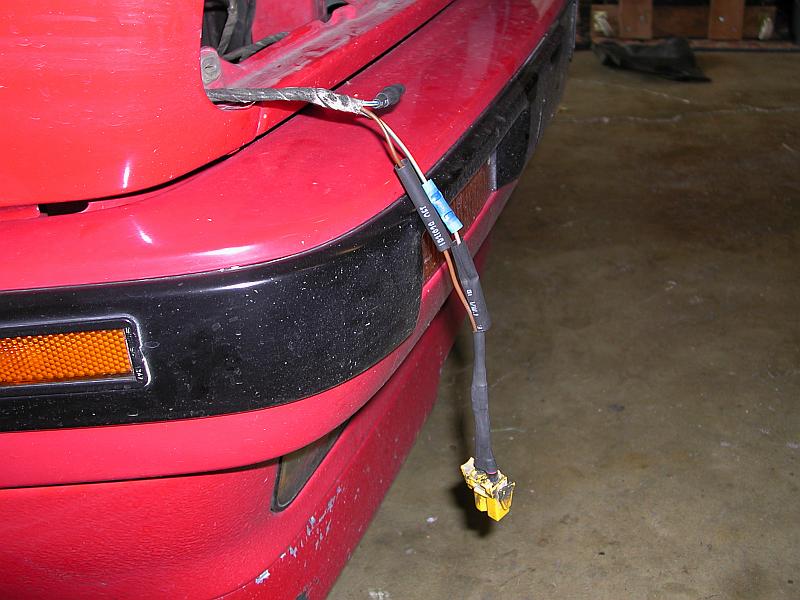
Purple/White - Passenger Side Marker Positive
Purple/Yellow - Driver Side Marker Positive
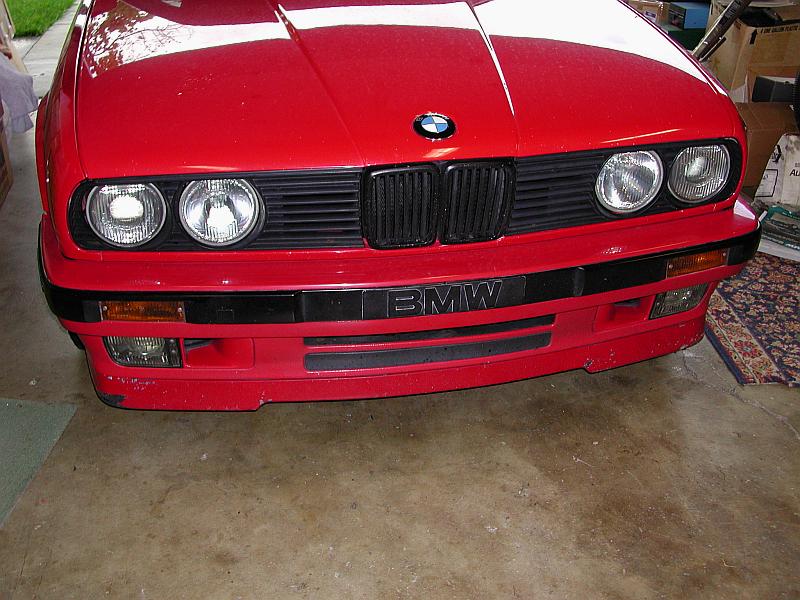
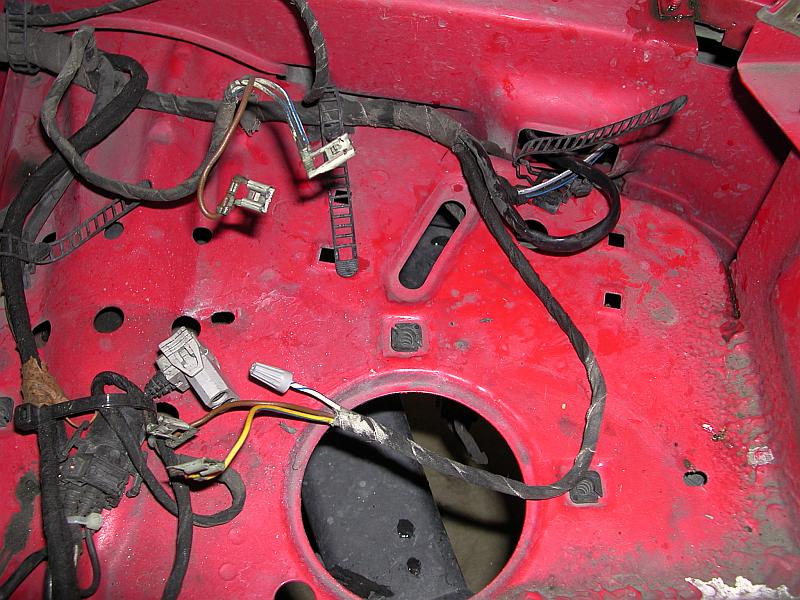
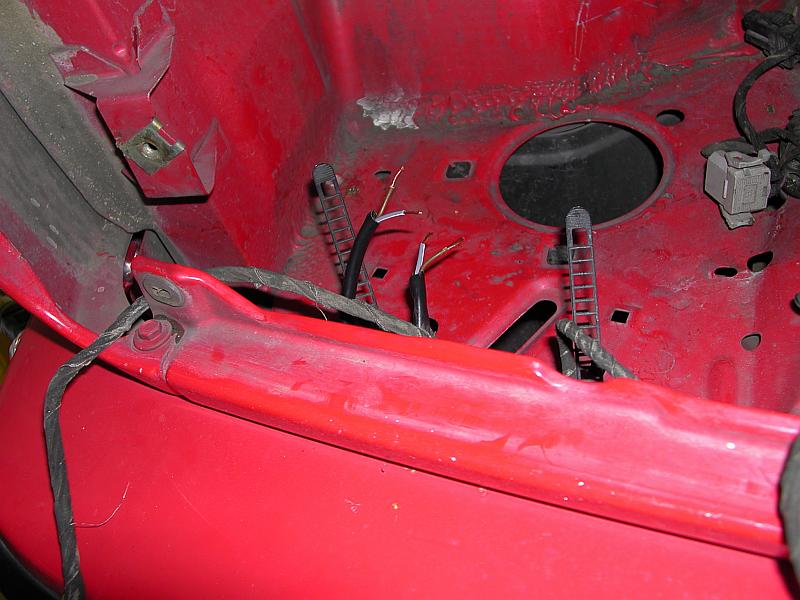
Begin by removing the two screws at the bottom of the grilles. Next remove the three clips from the tops of each grille section. They just pull straight up & off. Make SURE the car is completely off. The headlights should be off & do not have the car in accessory mode (yes I know, I like to listen to the radio too while I work, but not during electrical stuff). Remove the plastic shields behind the headlights. You may need to remove the air box to get at these, or just do a bunch of shimmying. Unplug the headlight connectors. Remove the three large screws holding the headlight buckets in place and carefully pull out the assemblies.
NOTE: The connectors I received with my headlights were slightly damaged (they were the original ones from the donor car). The wires' insulation was slightly pulled back from the connector, exposing the cores. I added some smaller shrink tubing up around the connector to build it up, added some slightly larger tubing that ran up onto each side of the connector (red tubing) and ran a large diameter piece over it all for strength. This is not really necessary unless you have damaged connectors.
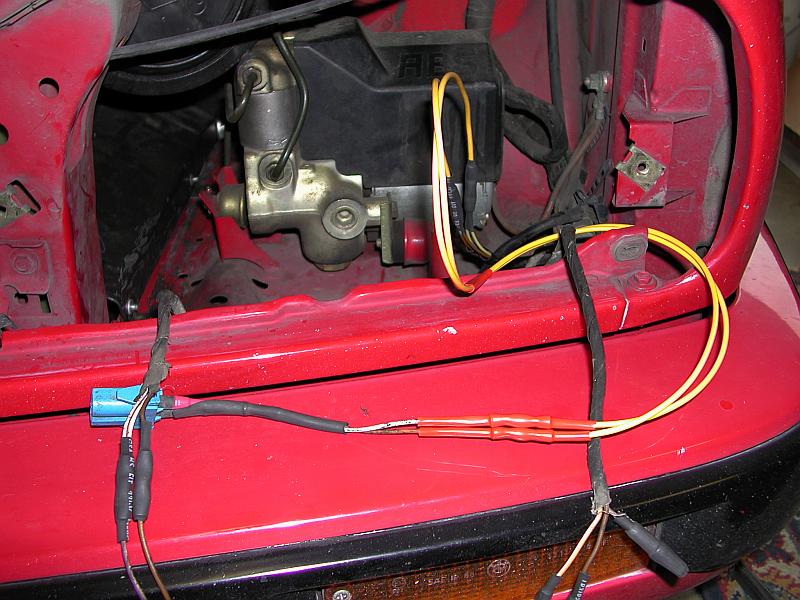
Now here is the point of no return. Cut the old connectors off, leaving maybe 2" of wire on them should you ever need to put them back. If you have sealed beams there will be three wires on the low-beam. The third wire (the white & blue/purple ones) is for the second filament for the high beam and can be capped & sealed. Either tape / cap & tape or cap & heat shrink the ends for safety. If you have the original connectors, the wires will all match in color with those in the car. Just match up the browns (grounds) and the other colored wires. On the high-beams, just twist both ends of the white wires together (if there are 2 as there are on sealed-beam cars). One runs off to the one you capped on the low beams, but do not bother wrecking the wire wrappings trying to remove it.
NOTE: I would recommend testing each connector after you crimp it in place. It is a good idea so that you will know if you make a mistake before you splice everything else.
If you had to purchase the wiring and connectors separately, the wire coloring may not match the factory wiring. Pull off the back caps on the lights and trace the brown wires (browns are grounds) & make sure that you know which wire is the ground when you assemble the connectors. Be absolutely SURE that the grounds are matched up properly before crimping the connections. Put the crimp connectors on the car's existing wires first, and attach the connectors later when ready.


NOTE: The male city light connector is the same as that for the 1989+ fog lights. If you can find one at a wrecker then you are set.
Conclusions & Results
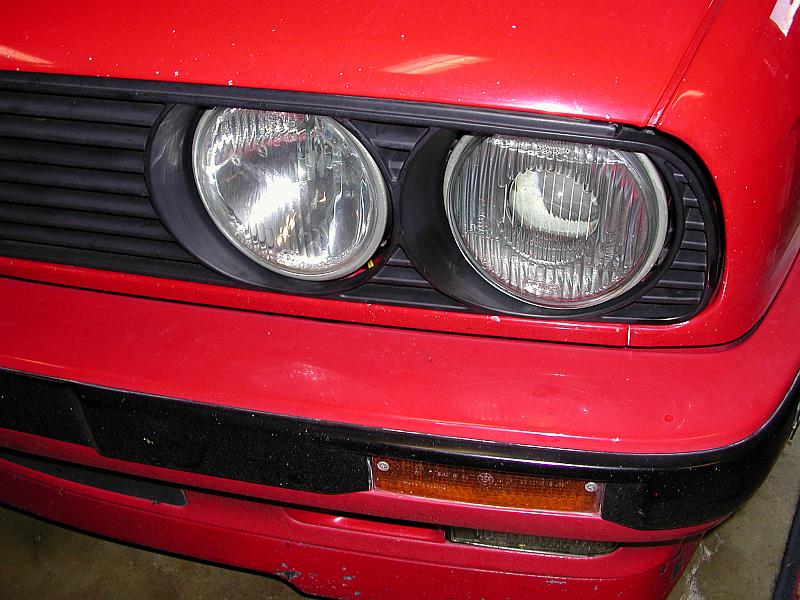
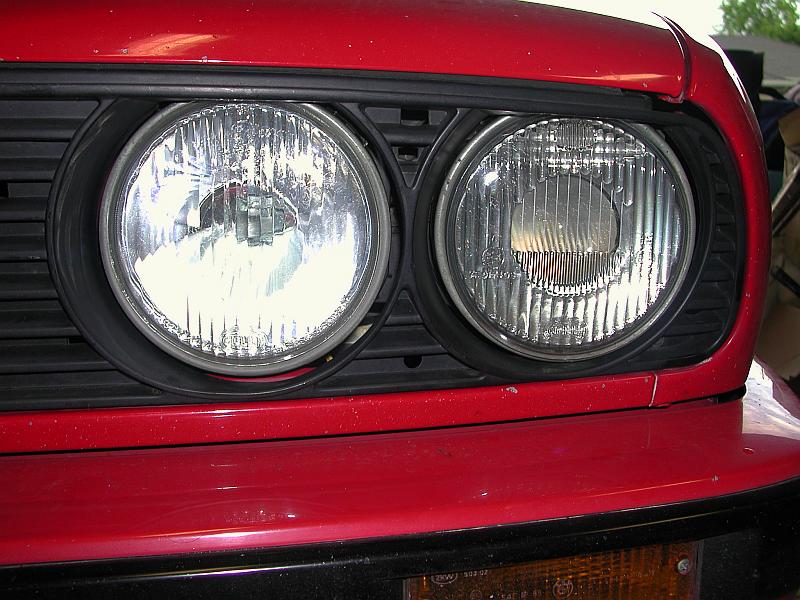
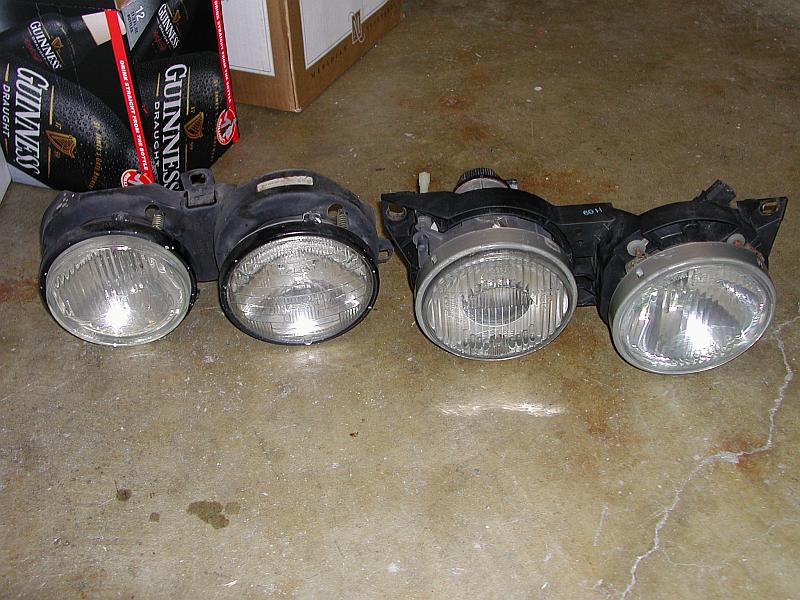
There are two versions of these lights out there. The most well known Euro Ellip's are the "smilies." They have a black arc under the center ellipsoid projector on the low beams. It is said to help focus light on the ground better immediately in front of the car. Unfortunately, this light is not helping the driver much as it is right in front of the car. The ones I installed are the other version, the "not smiling" lights. They are both Euro-Spec lights. There are just two versions of them, and one does not outperform the other.
DISCLAIMER: I take no responsibility (and thus I cannot be held responsible) for damages and/or injuries caused by attempting the procedures outlined on this site. The information provided is to be used at the reader's discretion and all necessary safety precautions requiring emplacement (mentioned or not) are the responsibility of the reader.