


Repairing & Refreshing A Broken Sport Seat
Abstract
Eventually, your sport seats will begin having issues. The symptoms will be a failure to lock the seat back’s angle and possibly having one side of the seat some up, allowing the back to move disconcertingly. The cause of this is most likely a combination of very sticky moving parts in the tilt mechanisms and some flimsy metal tabs snapping. The seat can be fully disassembled in about an hour, perhaps less. The scope of this article covers simple refreshing of the tilt mechanisms and repairs for the metal tabs. Welding will be required to fix the tabs as they are riveted to the frame. A big thank you goes out to Brandon Purcell for posting a similar tutorial on his web page that helped me to get started on this.
Tools
1/2" Drive Ratchet
17mm Socket for 1/2" Drive Ratchet
12" Extension for 1/2" Drive Ratchet
7mm Socket (Any Size Drive)
Small Flat Blade Screwdriver
Medium Flat Blade Screwdriver
Large Flat Blade Screwdriver
Medium Phillips Screwdriver
Needle Nose Pliers
Circlip Removal / Installation Pliers
MIG or TIG Welding Unit (or a local shop)
Required Parts
Any Decent General Purpose Oil (NOT WD-40 or any other aerosol oil!)
Procedure
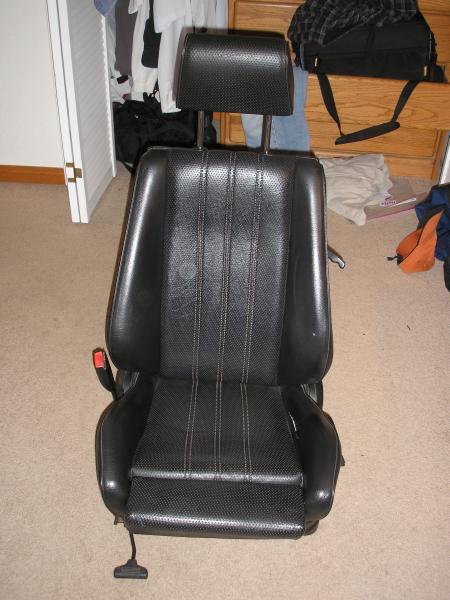
Begin by removing the seat from the car. It is secured by two 17mm nuts with lock-washers (front) and 2 17mm bolts (rear). Sliding the seat fully forward and backward will expose these fasteners. The 12” extension makes removal much simpler. Take the seat to a clean and comfortable location to work on it. You will need to remove the head rest, which is done simply by pulling upward forcefully until it pops out. Next you will need to remove the seat back release handle(s) found on the middle of the side(s) of the seats. Pulling hard is the key here as well.

Now tilt the seat back forward fully and notice the two screws at the bottom. Remove these, and then use a flat blade screwdriver to carefully pop the top of the lever-bezel out as seen in the image. On the passenger-side seat, look in the hole for the smaller of the two release handles. You will see a Phillips screw. Remove it and the metal lever so you can get the seat back's cover off in the next section.
To remove the rear cover, pull upward on it until it pops free. There are two clips holding it onto the metal bar in the back of the seat. These can come lose and fall, so make sure not to lose them.

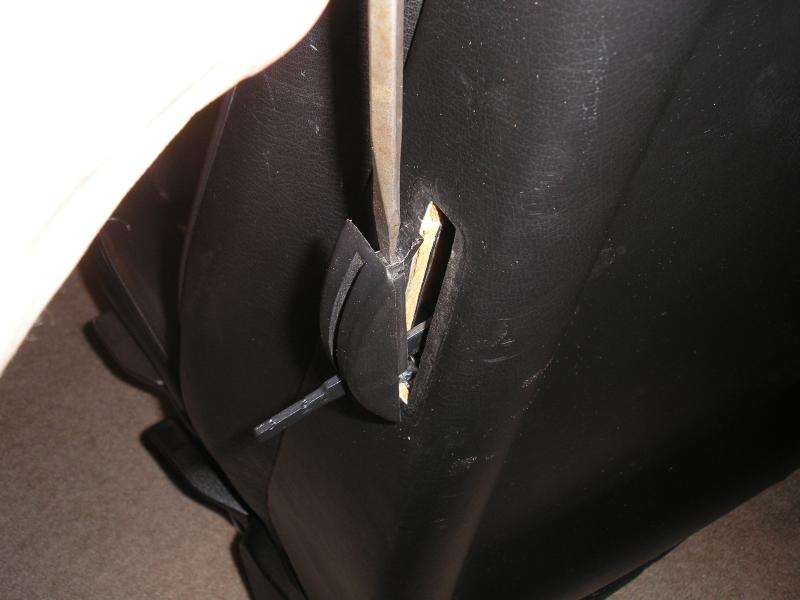
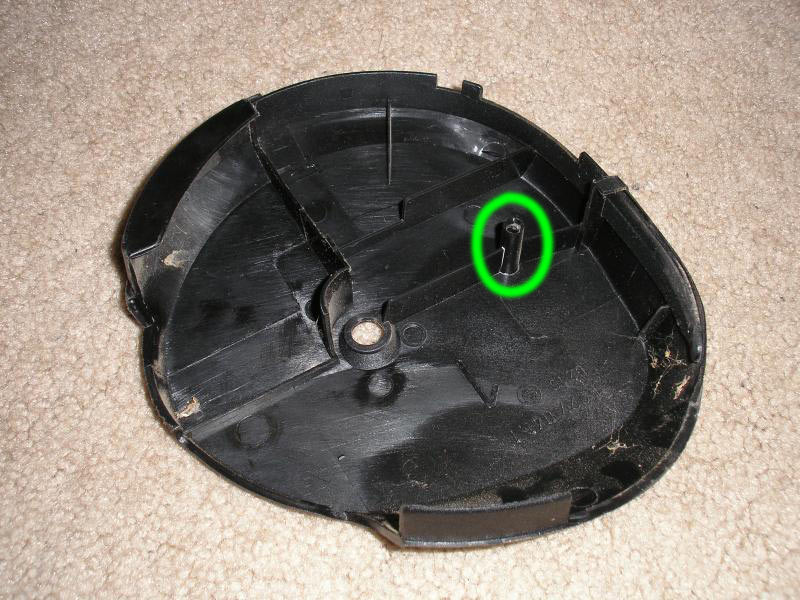
This next part can be tricky and requires care to not damage the plastic parts. To remove the black plastic covers on the sides of the seat, you will need to first pop the back part out where the plastic can be felt overhanging the parts underneath. Once free, careful pulling on the other side will liberate it. There is a small copper screw inside that goes into a hole in the cover. There is no way to unscrew it, but rather you must pull it off of this screw. These parts can be seen in the two images below. Repeat this process for both sides of each seat.
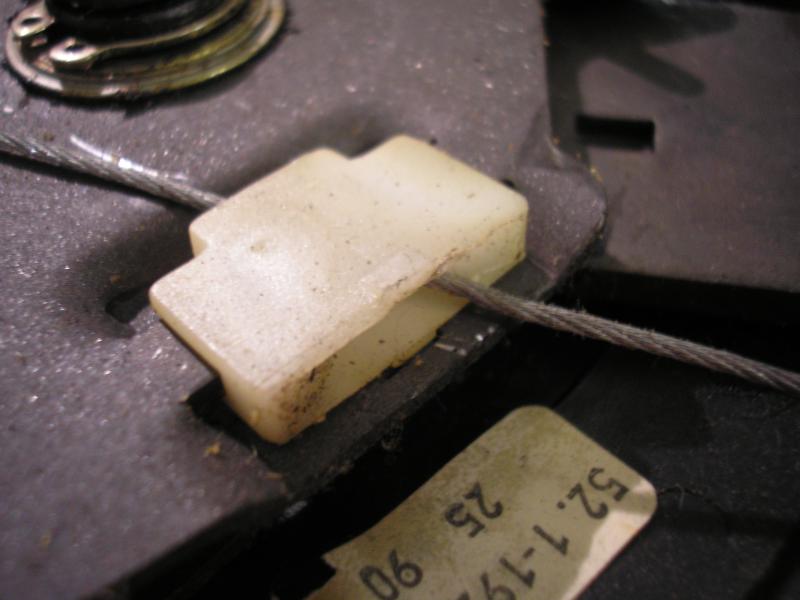
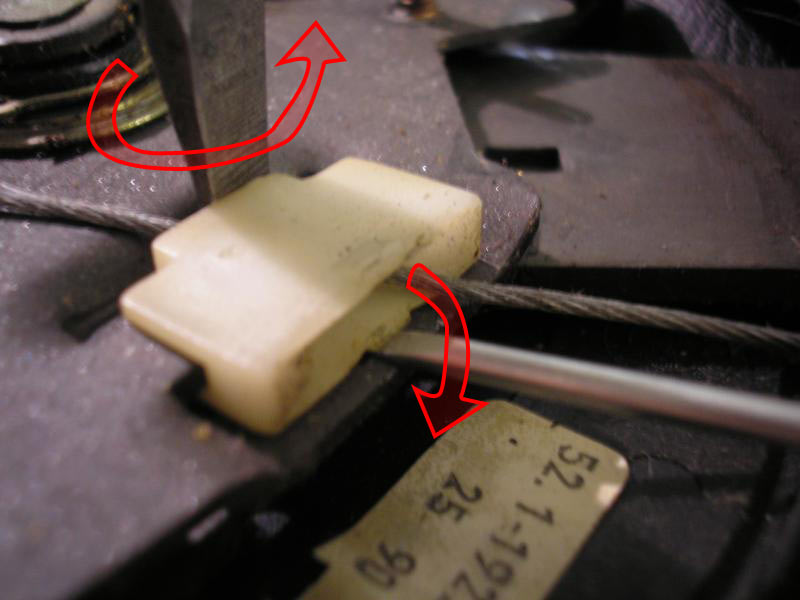
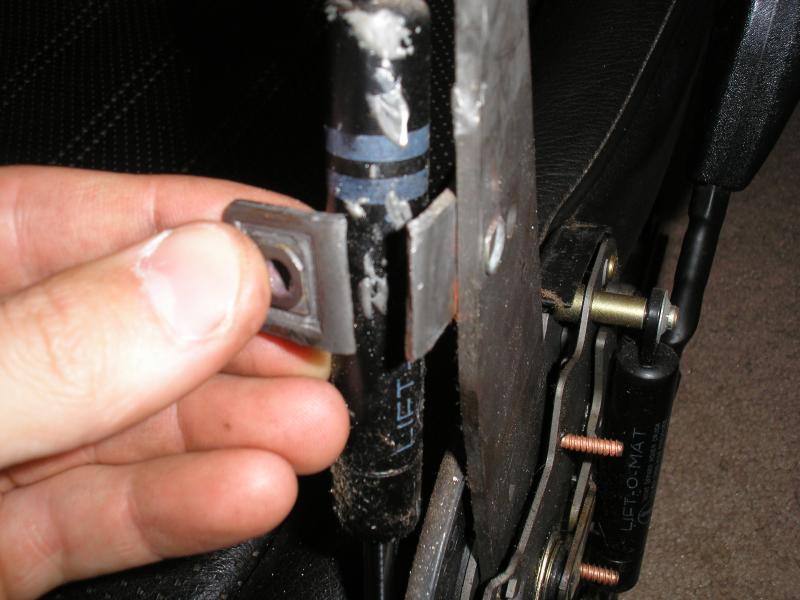
Now you will need to note the release cables coming down to each side of the seat. They are secured by a white plastic piece and a yellow metal tab. Removal of the white plastic part can be accomplished with a combination of the small & medium screwdrivers, as seen in the picture below. The yellow metal part will need to have its center tab bent up vertically to allow it to come off of the pin it sits on. Needle nose pliers will be required to pull it down far enough to get it off of this pin. Do this for both sides of the seat.

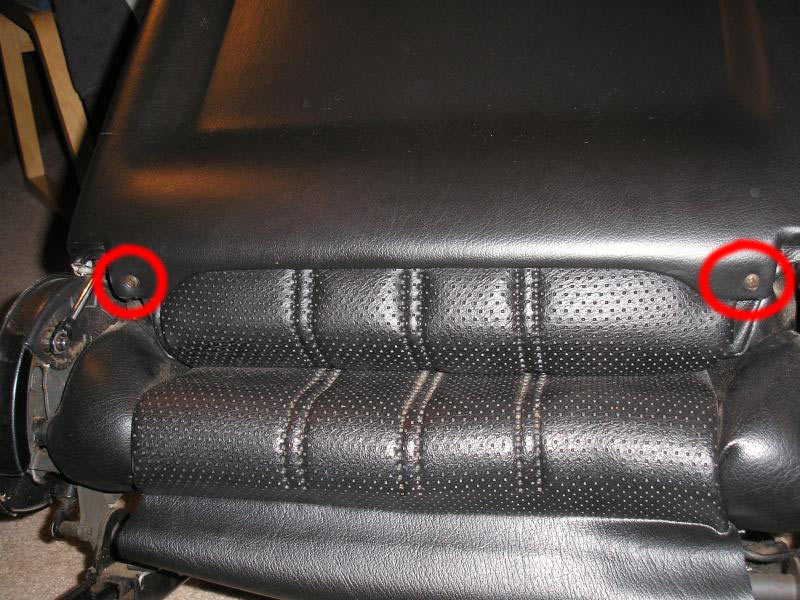
The final step of separating the back from the bottom is to remove the two large Phillips screws near the bottom in the back. Some careful pulling & maneuvering will have the back liberated and ready for inspection.
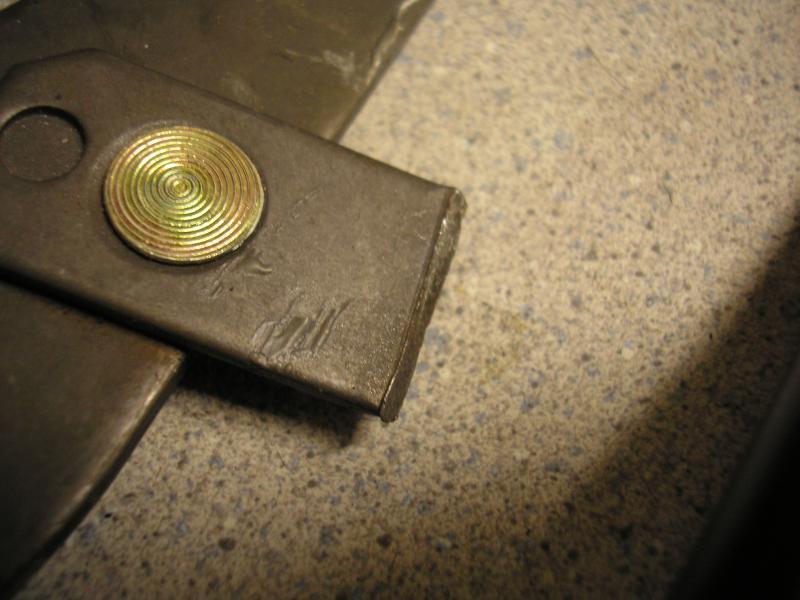
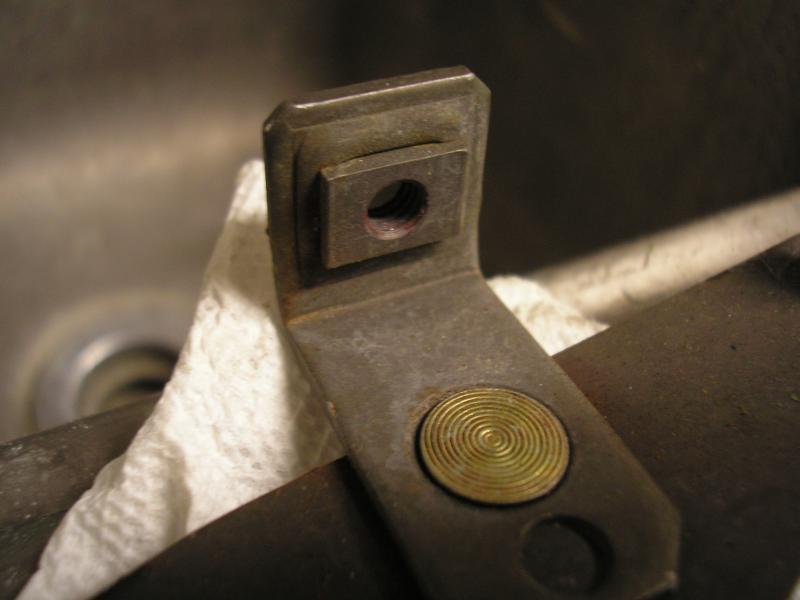
You should see some nice L-shaped tabs left on the seat base as in the first picture below. If you have been having problems with the seat, you likely have something similar to the second picture below. If so, don’t lose the metal piece that broke off or you will be in trouble!
If you are an extremely confident welder, don’t mind burnt vinyl / cloth / leather, you can try to weld it back together like this. Just don’t let the bead you run stick out past the flat back edge of the L where it mates to the seat back or it will align poorly and probably break again. I would recommend continuing to remove the tilt mechanisms to re-lube them anyway since stiff ones lead to these issues. You should be able to lift the seat back adjustment lever and move the two arms sticking up from the base, and have the gas pistons readily spring them back up to the top position. If they are having trouble, but are clearly still charged, then some oil should do the trick. If they fail to do anything at all and show no signs of having their gas charge, you should try to source some good ones from a wrecker, or ask around the BMW community.
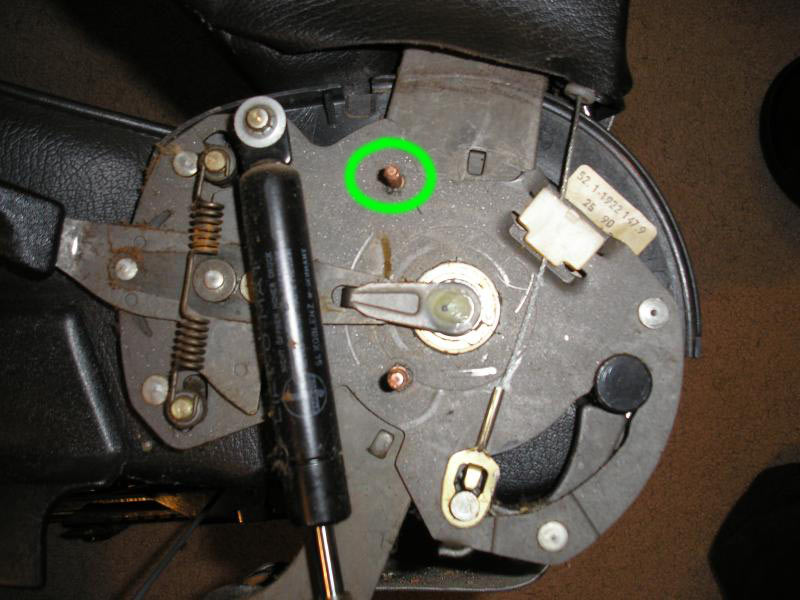
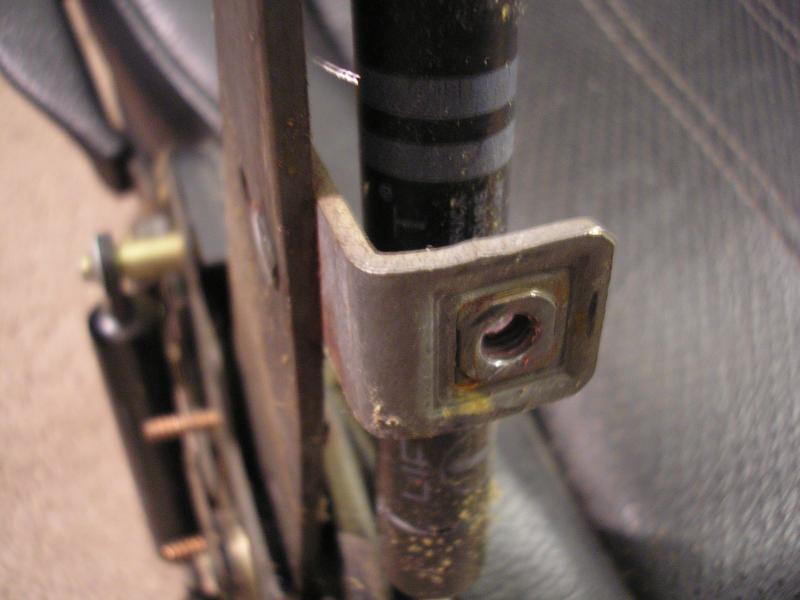
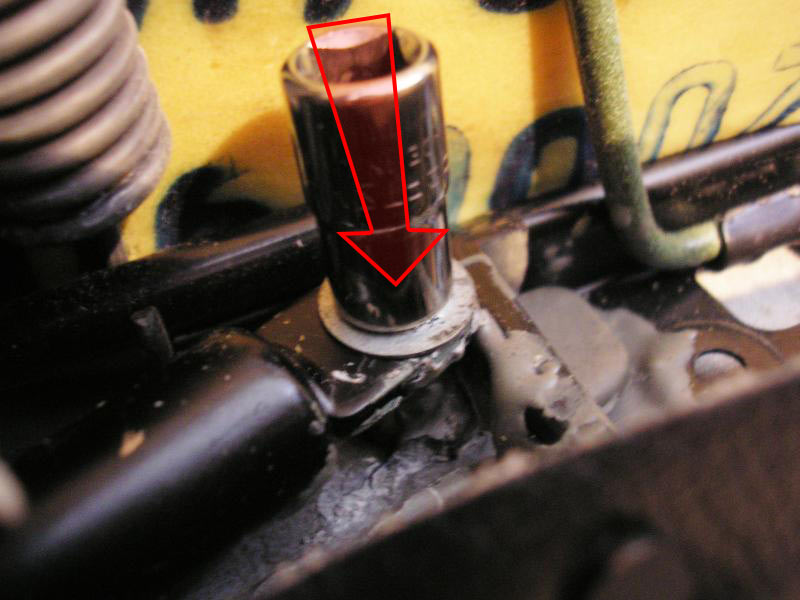
So, if you are willing to continue through the rest of this simple process, you will begin by popping the central pins out of the mechanisms. This is easily done by inserting a flat-blade screwdriver and turning it so that they pop out. You will also need to remove the circlips that were under the pins you just popped out. Next, remove the 17mm bolts fastening the mechanism to the seat base. Some will have black plastic covers on them. Liberating the arm from the base can require some fiddling with a flat blade screwdriver.
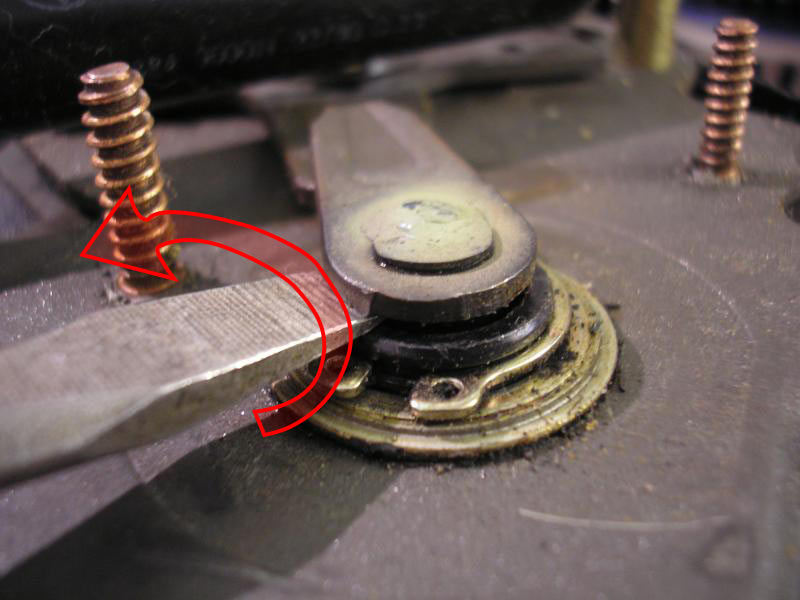
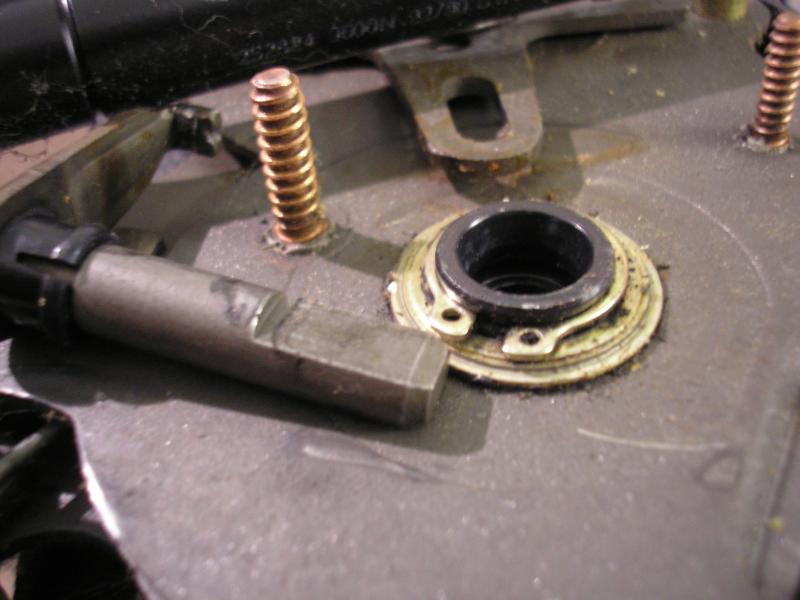


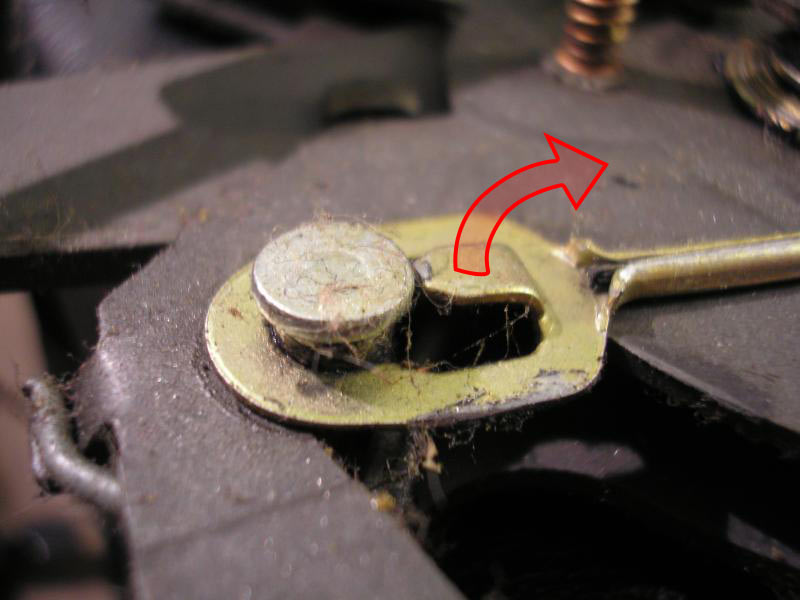
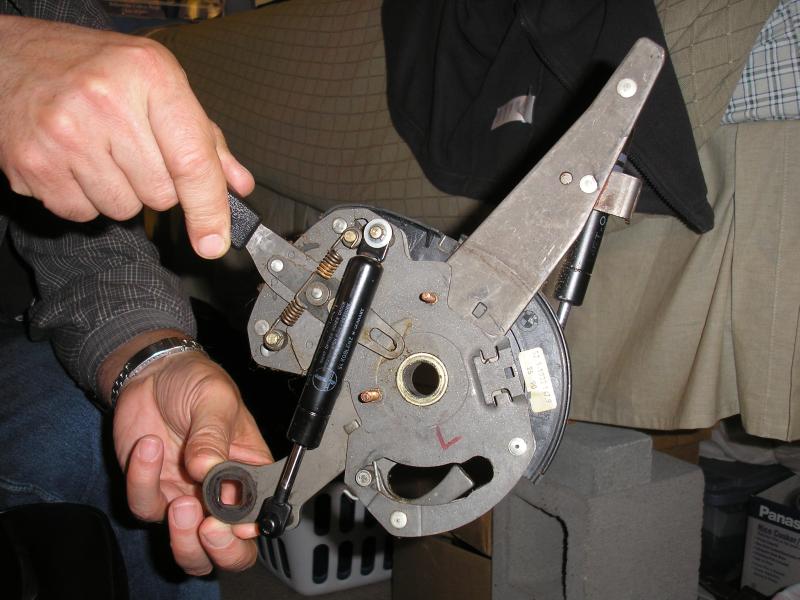
The final step to removing the mechanisms involves using a screwdriver to release the main back release mechanisms. This procedure is outlined in the pictures below. Just rotate the entire assembly to free it. Watch the square hole you just took the 17mm bolt out of as it likes to catch.

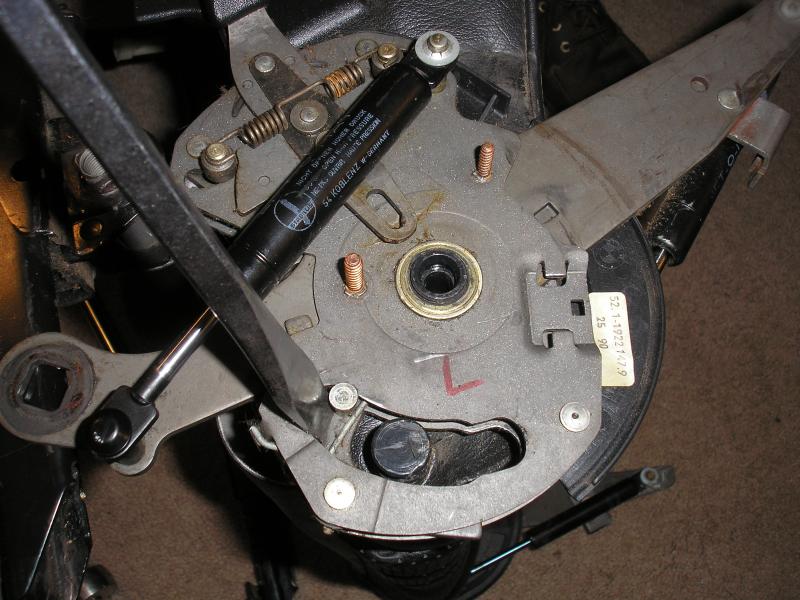
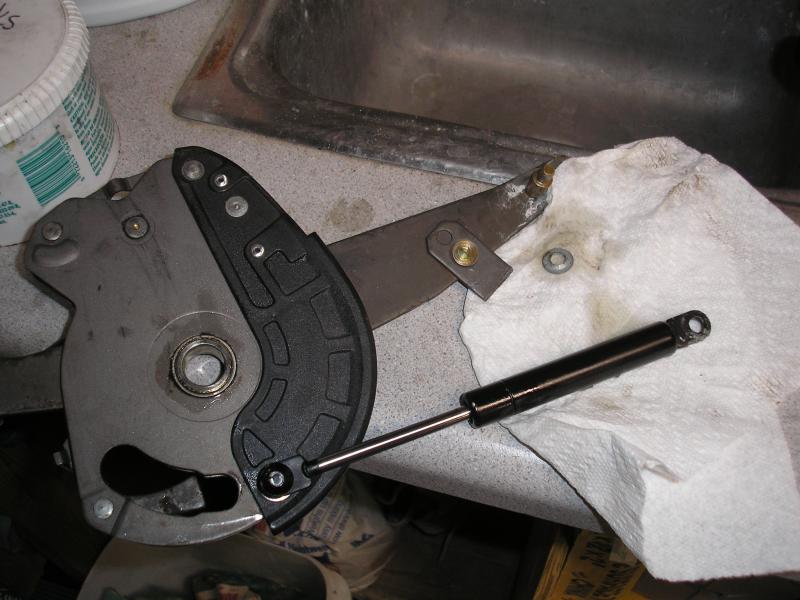
With the mechanisms off, you can inspect the back alignment teeth. Chances are that they are fine, but make sure they are not obviously damaged. If they are, source another unit from a junk yard. Disassembling this unit is highly unadvisable.
To safely weld the tabs back together, you will need to pop one end of the piston loose. This should be done carefully so as not to damage the lock ring at the end. It is not intended to be removed, so do not mangle it as it will be reused. Carefully using a large flat blade screwdriver, you can pry upward on the gas piston itself near its end (on the bracket part, not the cylindrical body) until it scoots the ring up enough to fit a smaller screwdriver between it and the piston. Pop it off carefully, and gently pop the piston off with another screwdriver.

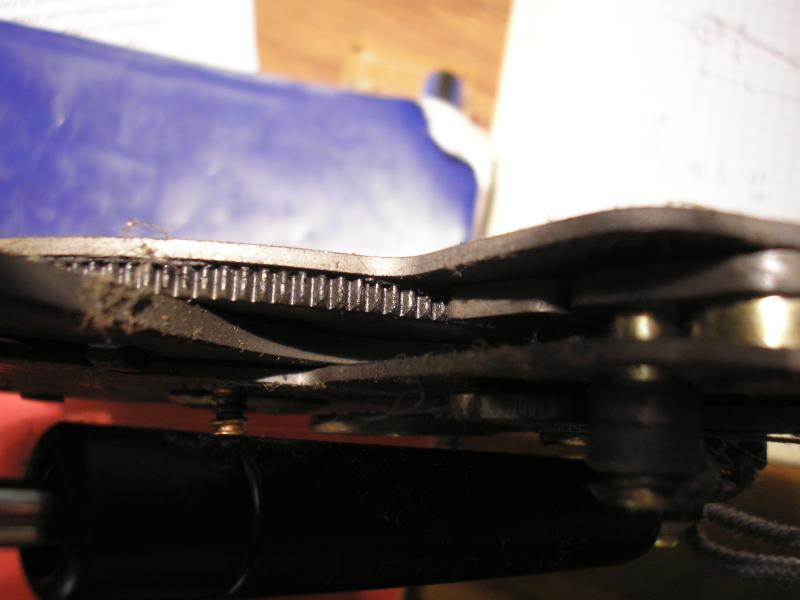
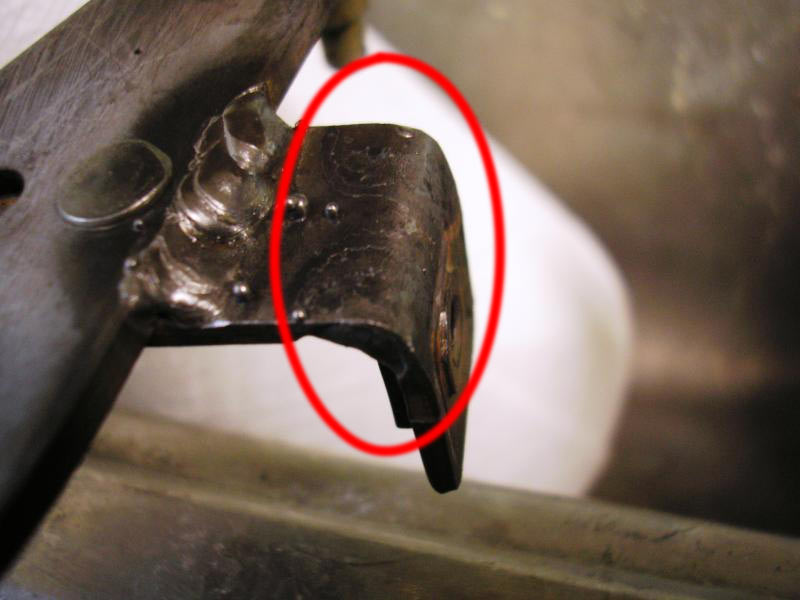
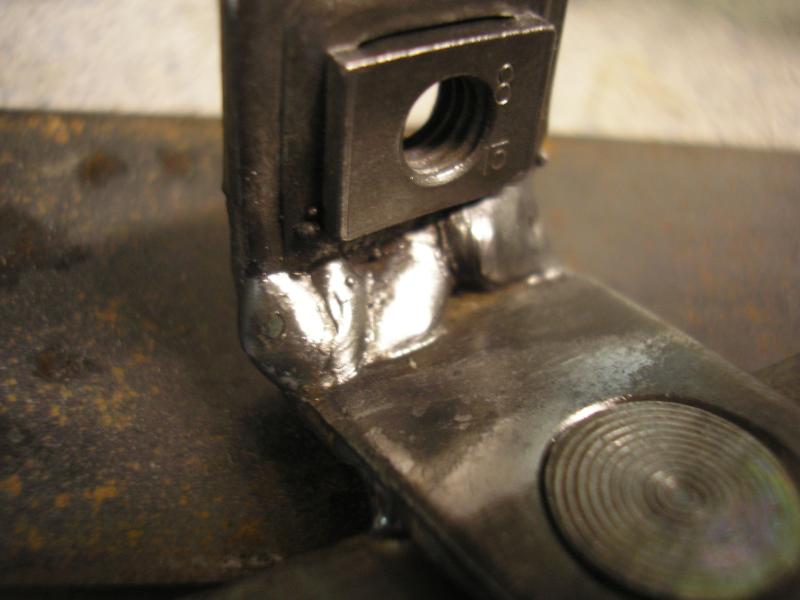
Now you can get a nice close look at the flimsy tabs that secure the seat back to the base. Even if you only have one broken one, you should strongly consider running a bead down the inside of the bend to relieve some of the stress concentration there. You can run a neat bead along the inside and outside of a broken tab for extra strength, but you will need to grind off any weld material that hangs out beyond the surface that mates to the seat back. When welding the inside only, check to make sure that the metal on the outside has been discolored as in the third picture below. This is a sign of good penetration of the weld, as opposed to a weak superficial weld. Notew the weld between the L-bracket and the support arm. This is unnecessary, but can help to reduce some movement and stresses created by the rivet connection.
With the welding done, apply some decent quality lubricant to the inside of the mechanism. The original grease is dried up and pressed out of the areas it is needed. The oil won’t last forever, but it will help a lot, and is easy to re-apply when the seats are reassembled and reinstalled. Lubricants like WD-40 and any other aerosol can oil should not be used. They are messy, and are mediocre as lubricants.
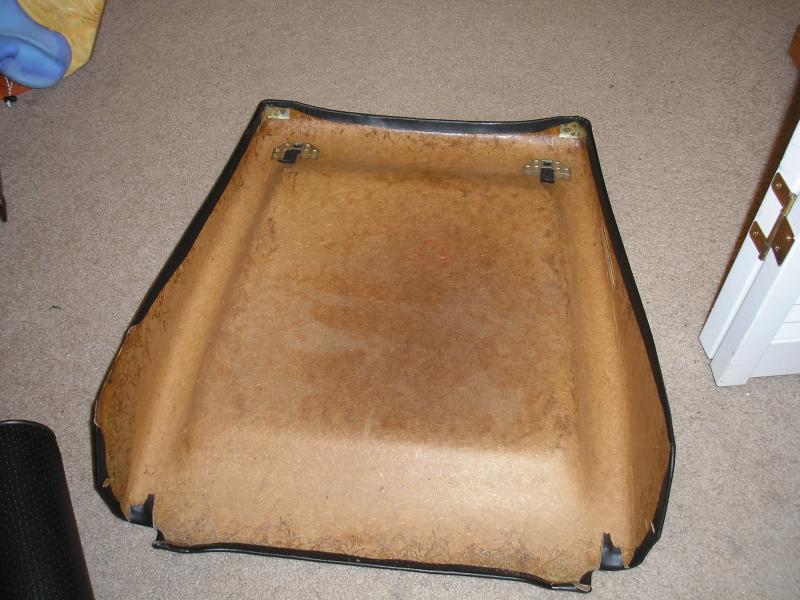
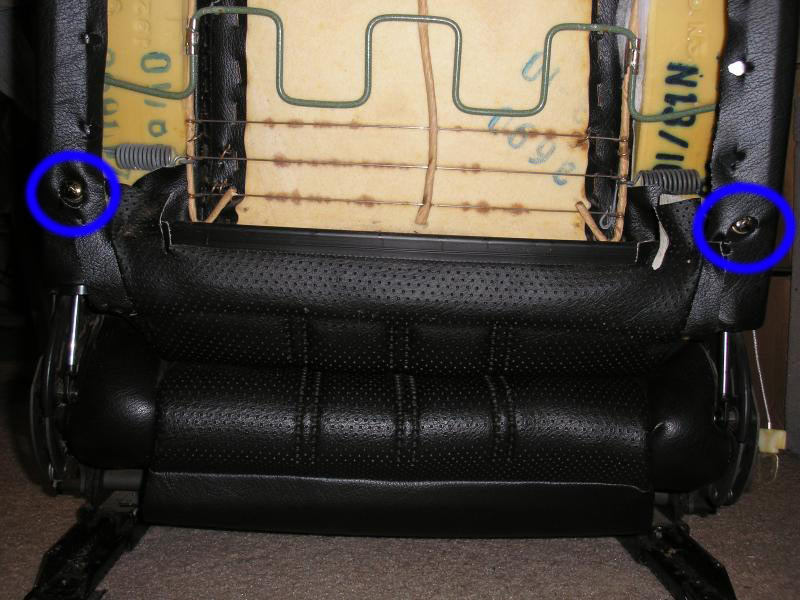
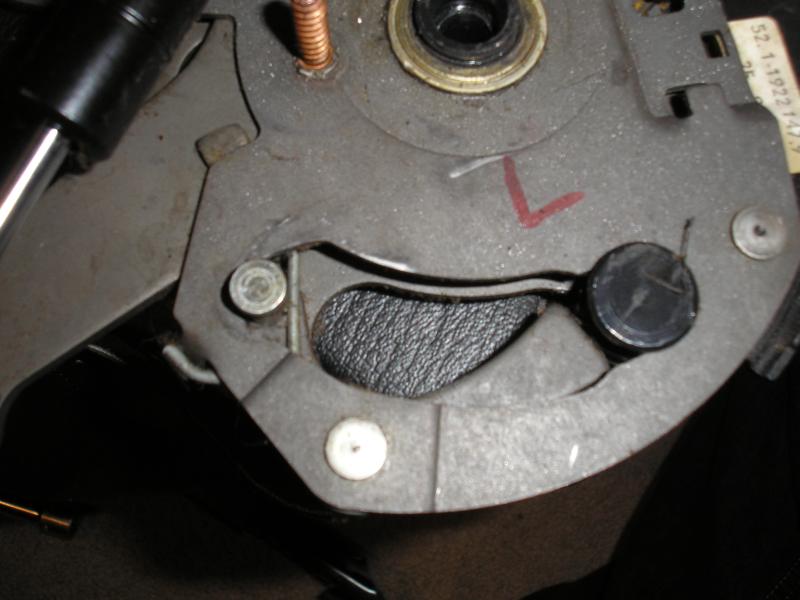
Now that the primary repairs are done, you can inspect the seat back’s frame for other cracks and warping/bending. The covering is simply attached, using only a series of small hooks and prongs. Carefully unhook the side bolsters’ coverings to check the frame rails for cracking. If cracks are present, the seat coverings must be fully removed to avoid fires. These cracks and small warping is all it takes to cause the back locking mechanism to fail to lock, and leave the seat back flailing. Try to straighten any bends or warping.
Once done, reassemble the seat. That procedure is the exact reverse of the disassembly outlined above. After this, the seat should work like new! One reminder is to be sure to reinstall the lock ring on the piston end that you freed. THe pistons can be very stiff, and you will need to put the piston on the edge of a table and puch downward on the entire machanism to compress it. With the pin it mates to off of the table's edge, you should be able to compress the piston & align the pin with the hole. When reinstalling the lock ring, use a 7mm socket and lightly tap it to reinstall the ring evenly. Also, when putting the tilt mechanisms' plastic covers back on you will need to look through the small gap between it and the seat and visually align the smaller copper screw with the corresponding hole inside the cover. On the side with the seat belt buckle, this is far easier to do with the buckle removed.
Conclusions & Results
After completing the outlined procedure, your seats should work like new. The simple mis-alignments caused by the flimsy mount tabe breaking, or the seat back frame warping are more than enough to leave the back flopping around dangerously. Overall, this procedure should take no more than 2 hours.
DISCLAIMER: I take no responsibility (and thus I cannot be held responsible) for damages and/or injuries caused by attempting the procedures outlined on this site. The information provided is to be used at the reader's discretion and all necessary safety precautions requiring emplacement (mentioned or not) are the responsibility of the reader.