

Re-Carpeting the Rear Deck
Abstract
Eventually, the carpet covering the rear parcel shelf will fade from decades of UV exposure and heat. Fortunately, the parcel shelf is not a terribly conspicuous cosmetic item, but if you are meticulous in your car maintenance, it will bother you. Re-covering this item is a fairly simple 1 hour process, given the right material. In this article, I will show you how to do it.
Tools
1/4" & 1/2" Drive Socket Wrench
10mm (1/4" Drive) & 17mm (1/2" Drive) Sockets
3" or 6" Socket Extensions for both Wrenches
Heavy-Duty Scissors
X-Acto / Craft Knife
Heat Gun (LOW Setting) or Hair Dryer
Medium Phillips Screwdriver
Optional: Drill w/ 5/32" Bit
Optional: Pop Rivet Tool
Optional: Hot Glue Gun (High-Temp)
Required Parts
Carpeting / Cloth of Your Choice
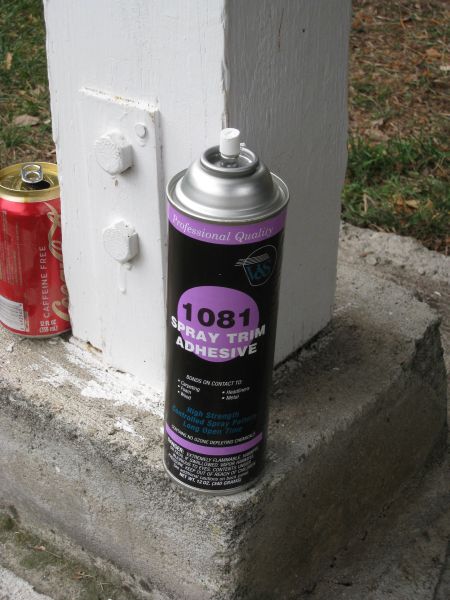
Upholstery Adhesive (I prefer V&S 1081 Spray Adhesive)
Isopropyl Alcohol
Optional: Small Wood or Metal Strips
Optional: 1/8" Pop Rivets & Washers
Optional: Hot Glue (High-Temp)
Optional: 22ga Aluminum Sheet Metal
Procedure
You start by removing the rear seat parts. The seat bottom is removed by pulling up on the front edges, near the sides. This will release the two large clips, and it will come right out. The seat back is held to the chassis by two 10mm bolts located at the sides, at the bottom. Remove these bolts and pull the seat back straight up. This will pop it off of its two hooks. To get the parcel shelf out, you need to break the two black plastic seat belt guides loose by wiggling them upward (they can be stubborn, but don't pry on the brittle plastic). You will also need to take the seat belts out of these guides to get the shelf out. Once that is done, remove the two 17mm bolts that secure the seat belts to the chassis. The final things holding the parcel shelf are a plastic pop-clip in the middle & the speaker connectors. Just pull up on it, and it should come loose, and then unplug the speakers.
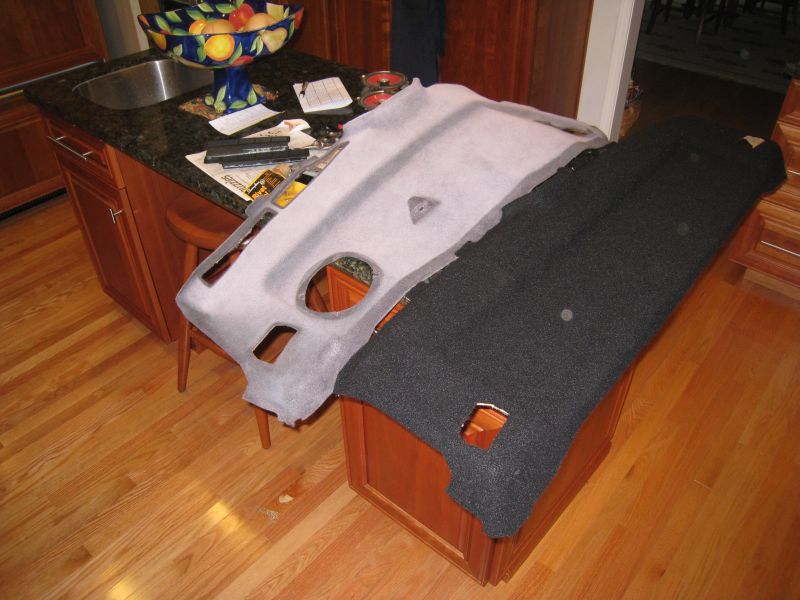
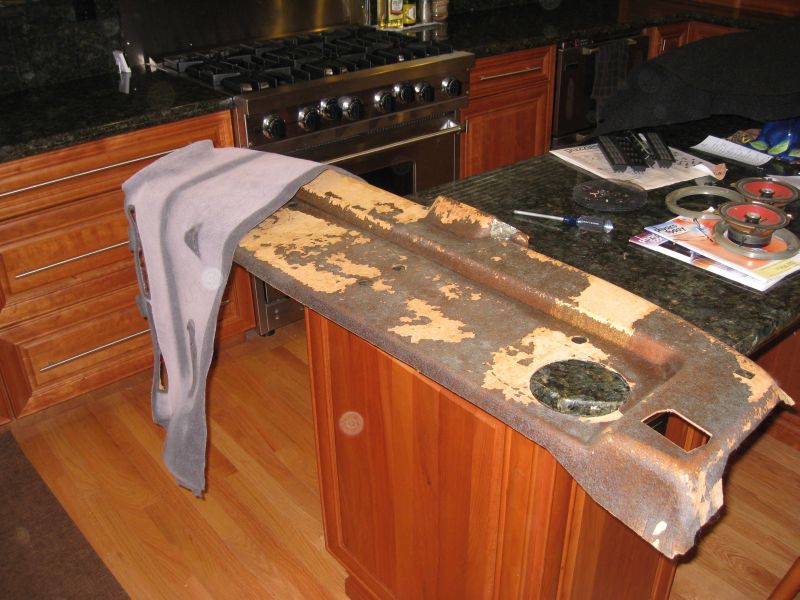
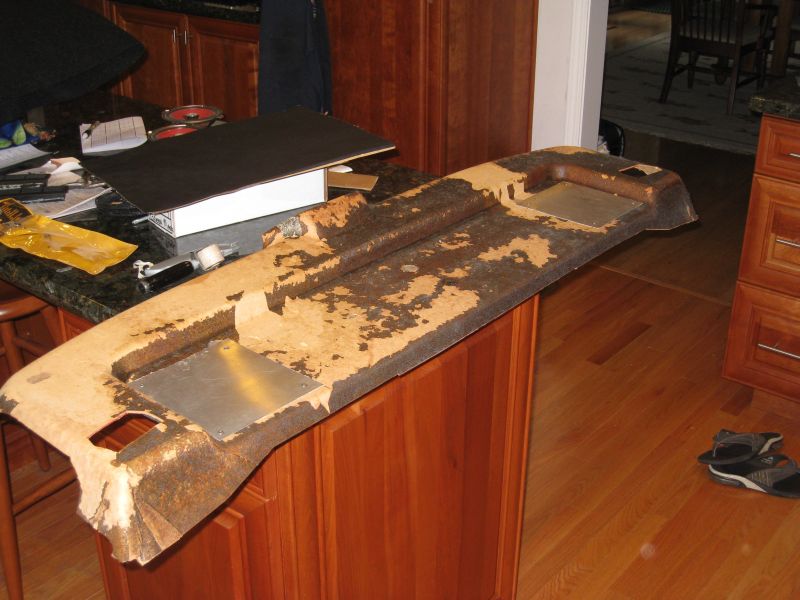
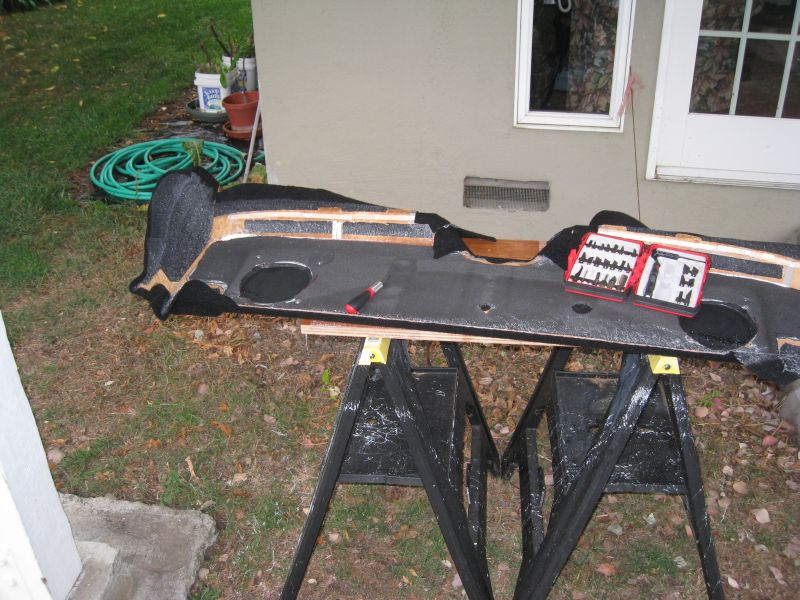
The next order of business will be to remove the old carpeting. Pop out the four black vent pieces & set them aside. Remove both rear speakers with the Phillips screwdriver. The old carpeting can be pretty stubborn, so work carefully to remove it. Start with one of the corners and slowly begin peeling it back. It will most likely pull off a lot of the deck's paper layering with it. Using a hair dryer (or a heat gun on a LOW setting) on the areas you are peeling off can soften the adhesive a little, making life easier. You want to avoid pulling off the paper layers as much as possible. Be particularly patient with the thin parts around the vent cut-out, these are fragile. Wipe the surface down with a rag that has some Isopropyl alcohol on it to remove any oils or other loose contaminants. This will help the spray adhesive to work better. Don't soak the paper though, or it may warp. If you want to fill-in some of the other random holes in the deck, do so now with whatever you have available. I didn't want any depressions or sunken spots showing up in the carpet.
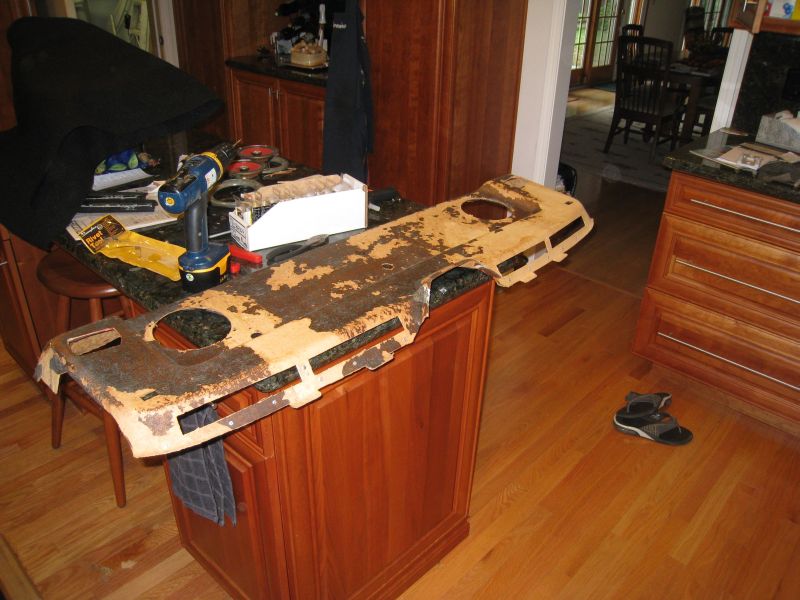
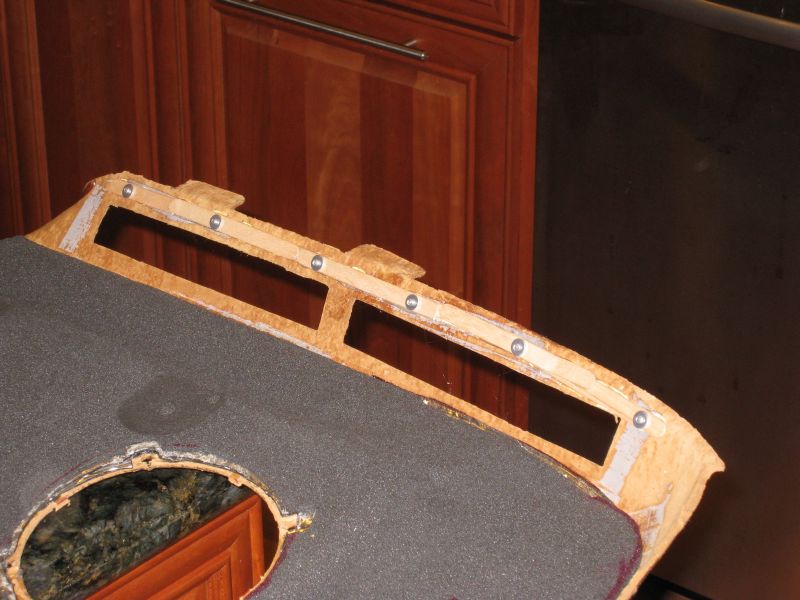
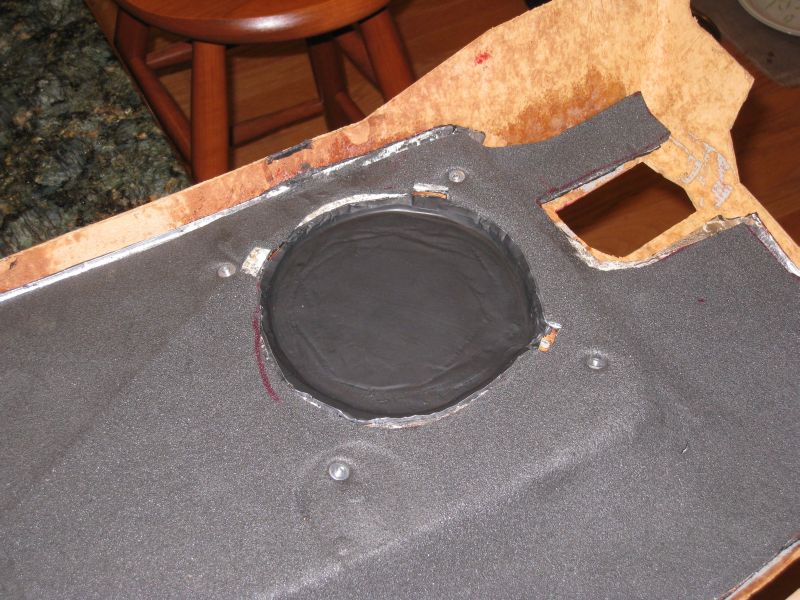
The next portion is optional. My rear deck was badly warped around the vent holes, and the vents would always fall out. This needed to be fixed. I also wanted to fill-in the speaker holes because I am not using the rear speakers with my current sound setup. To deal with the warped portions, I used some hot-melt hot glue, popsicle sticks & pop rivets. Yes, this sounds like a 3rd grade craft project. I glued the sticks into place and then drilled all the way through them and the shelf for the rivets. You will also need to use washers with the rivets to avoid pulling them through or splitting the wood. If you have other thin wood or metal scraps that would work here, you can use those. The speaker holes were covered with some 22ga Aluminum sheet metal. Once it was cut to the proper size, I applied spray adhesive to them and set them into place. After letting the glue sit for 20 minutes, I drilled holes in the four corners and installed pop rivets. Use washers here too! In this case, 22ga sheet is thin enough that there will not be any obvious line showing in the carpet. I would highly recommend adding some sound deadening to the bottom of the parcel shelf, or at least the metal bits. This will prevent rattling and other undesirable noises.
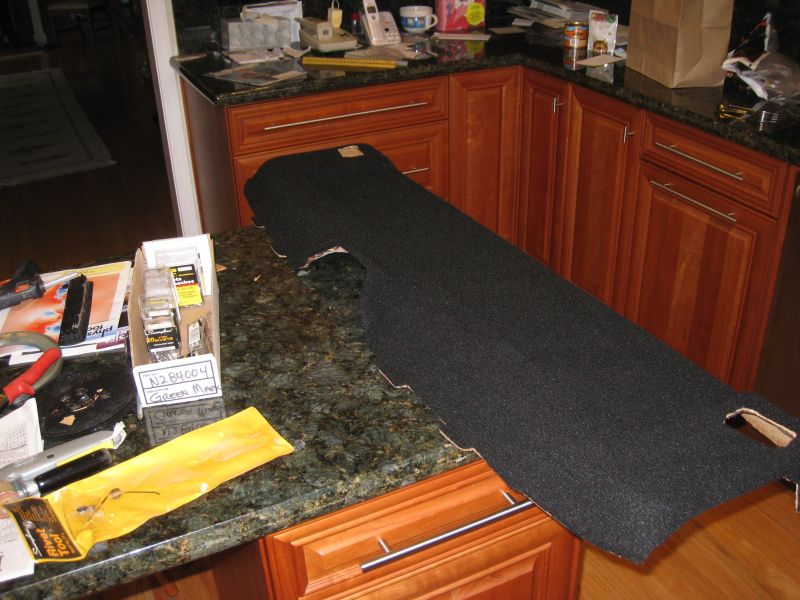
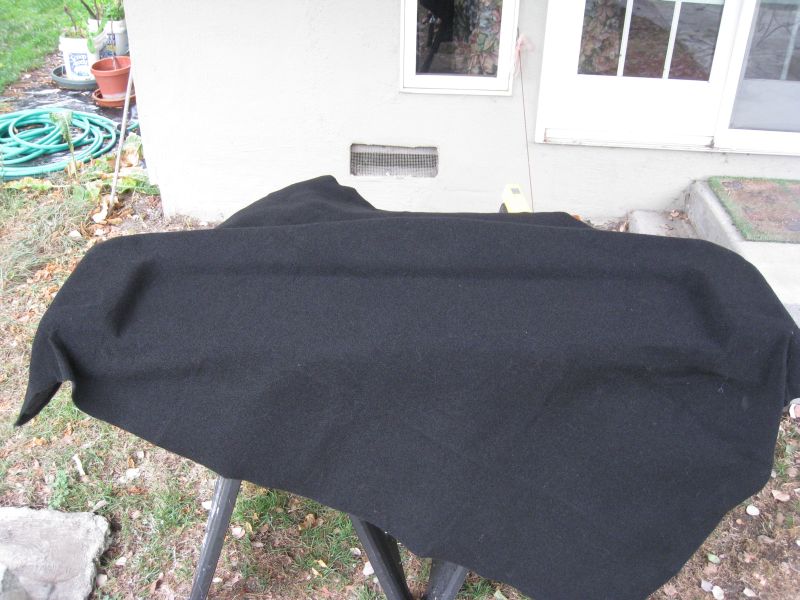
Here is where the fun part starts. You will need a piece of carpeting (or whatever material you choose to use) that is about 64" wide by 24" long. An oversized piece like this makes things go more smoothly. I chose to use some black speaker cabinet carpeting from Parts Express (don't use the stuff with latex backing, it is far too stiff to drape nicely). There are many options out there, and the material I chose might only last a couple of years since it is not intended for harsh car conditions.
Start by putting the rear shelf somewhere well ventilated, and with lots of working space. The spray adhesive is at least at good at killing brain cells as it is at holding carpeting in place. Get the carpet draped over the shelf and make sure that it will completely cover it before gluing anything. You only get one shot at this. The carpet is attached in 5 sections (shown in the 3rd image below), in this order:
1 - Lower deck area & front vertical face only, no other vertical parts
2 - Top-left & adjacent vertical portions
3 - Top-right & adjacent vertical portions
4 - Upper deck top & middle vertical section, sides, and a little of the brake light housing
5 - Brake light housing and back; be careful with this section and make sure to get the cloth to fit tightly around the brake light housing.
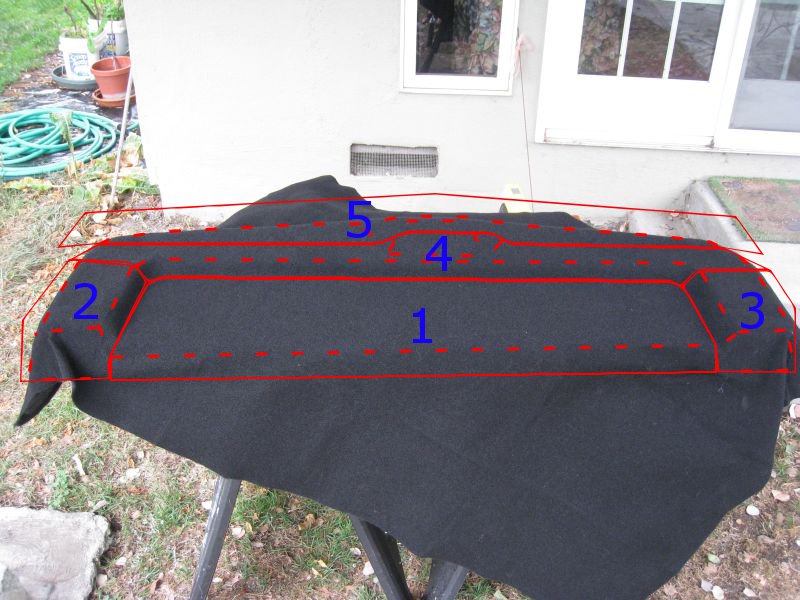
After you glue each section, firmly run your hand over the carpeting to make sure that it is firmly attached, without bubbles. The best results come when you spray the adhesive to both the deck and carpet, and let it sit for 30-60 seconds before mating the pieces. You will find that the cloth bunches up (unavoidably) in the vertical areas in front of the seat belt openings. This is fine; just make sure that the bunching is only on the vertical portions. You can trim this later, and it will be covered by the seat back anyway. Once you have glued it all down, let it sit for 30 minutes.
Now you can start with the final few steps. Flip the deck over. Make sure that the carpet is firmly glued to the vertical parts of the deck. Carefully re-glue any spots that are loose. You will need to fold the carpeting into the brake light housing and glue in about 1/2" if it (like the original carpet was). Use your X-Acto / craft knife to make slits so that it can fold in, and carefully glue it into place. While that cures, you can begin trimming the rest of the carpet. I recommend a knife with a curved upholstery blade. When trimming cut by pulling toward the inside so that the carpet is pulled onto the deck, not away from it. Work slowly and carefully to get a clean edge.


Finish trimming the perimeter and cutting out the vent & seat belt holes. If you are keeping the rear speakers, cut those holes out too. Reinstall the vents, and you are done! Your new deck should look much nicer than it did before with its expired carpeting!