


Installing A Polyurethane Differential Mount
Abstract
When your differential mounting bushing is due for replacement, you have a few options. You can replace it with another OEM webbed rubber bushing ($35), an OEM solid rubber bushing ($90) or an aftermarket polyurethane bushing (typically $50-70). The replacement can easily be done on-car by removing the differential cover. A polyurethane bushing is easier to install than a stock one as it does not require a press, and it can last longer than a rubber one. Any performance gains are negligible over a stock one as far as improved throttle response is ocncerned. No additional noise or vibration was observed in the vehicle after installation either.
Tools
Assortment of Metric Sockets & Drives (3/8" & 1/2")
14mm Allen Wrench
19mm Box Wrench
Medium Phillips Screwdriver
Medium Flat Blade Screwdriver
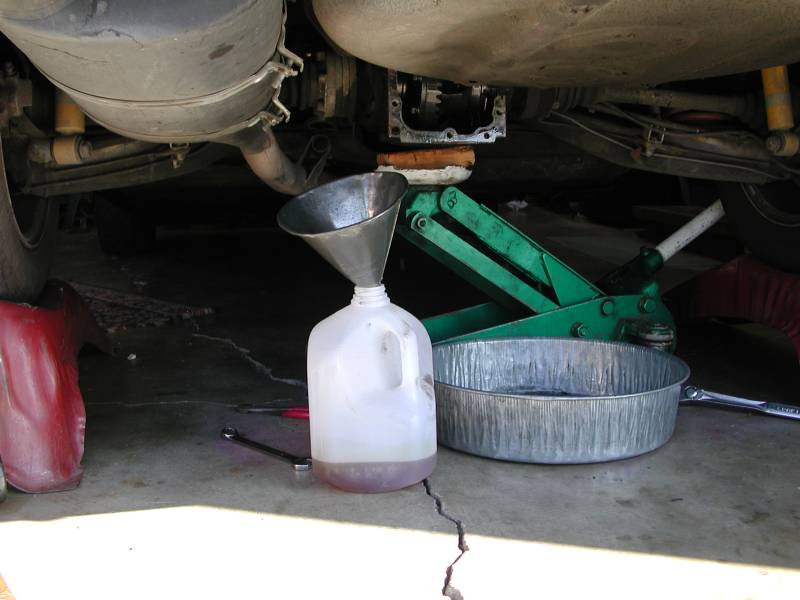
Oil Recycling Container
Oil Pan
Funnel
Roughly 1.5m of 2cm ID Tubing
Hack Saw
Hammer or Mallet
Required Parts
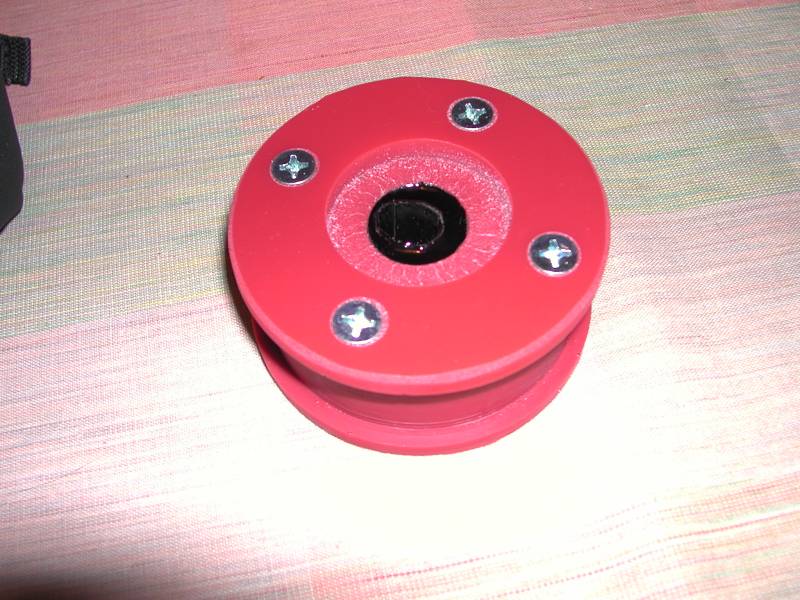
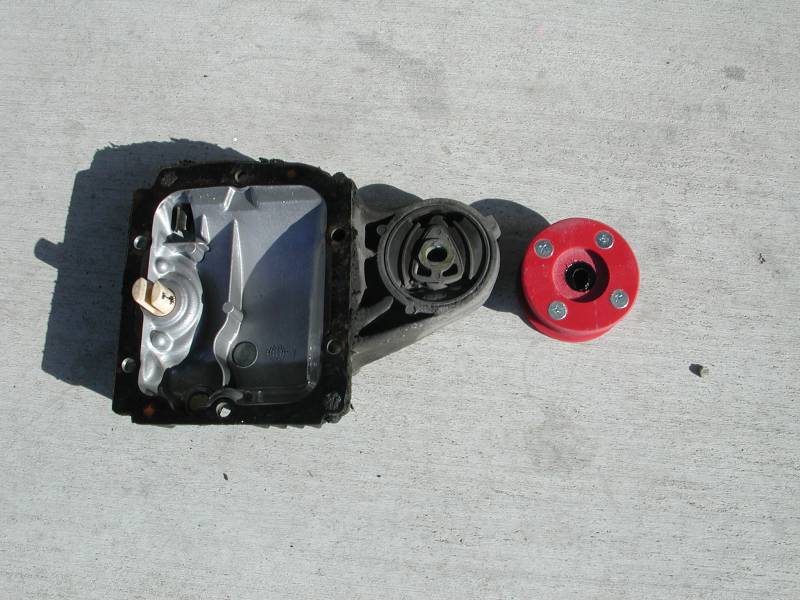
Polyurethane Differential Mount
Differential Cover Gasket [PN 33-11-1-210-428]
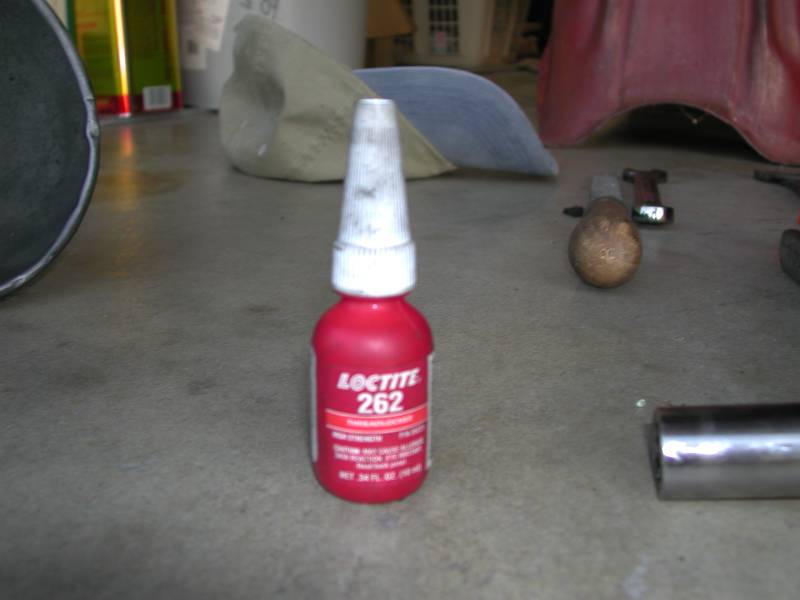
Thread Locker
New Gear Oil (non-hypoid type, 75-weight or heavier)
Penetrating Oil
Procedure
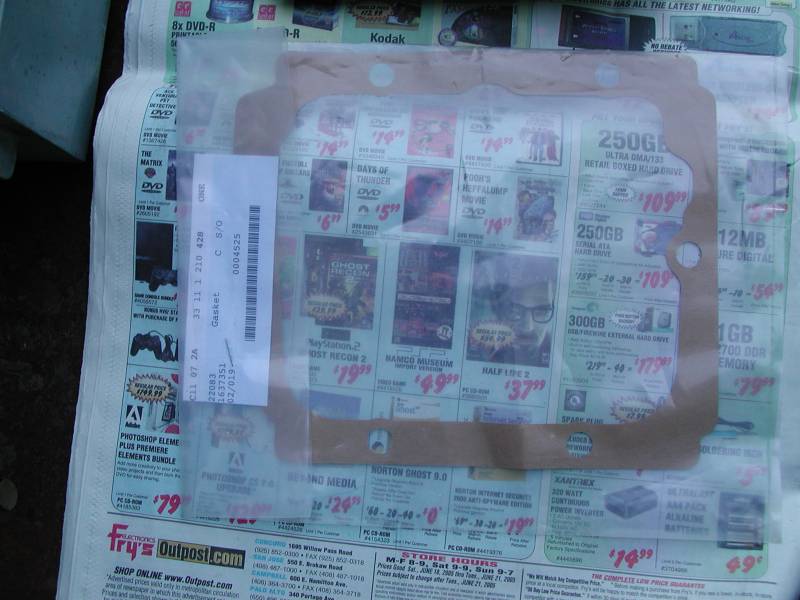
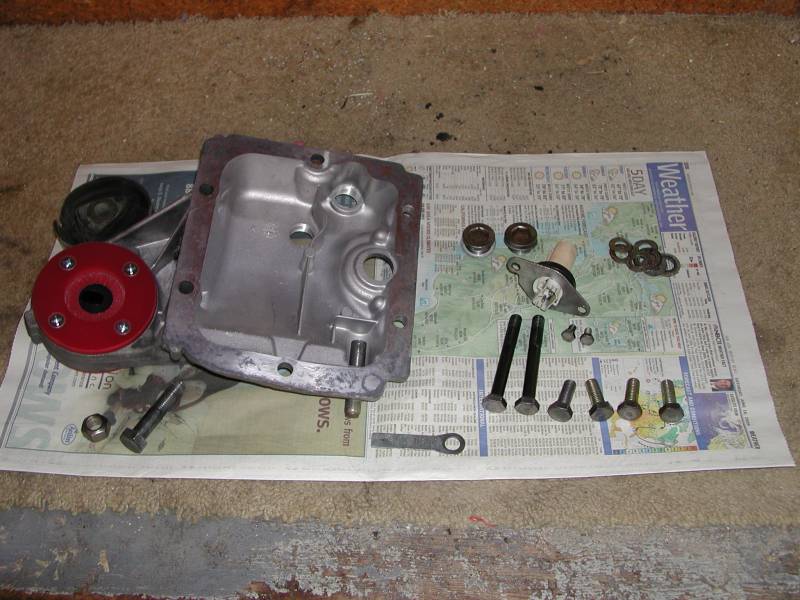
Make sure you have the following items on-hand. You will be needing a new differential bushing, new differential cover gasket and thread locker. As always, you should thoroughly clean any parts you pull off of the car. The device of choice, especially for something as dirty as a differential cover, is an ultrasonic cleaner. It makes very messy jobs much easier.
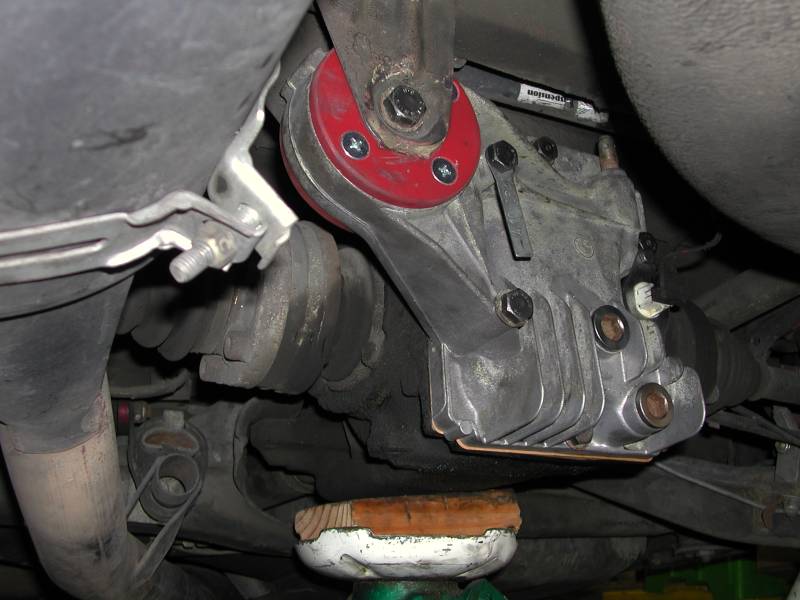
Begin by jacking and properly supporting the vehicle so as to avoid potential injury while under the car. Support the differential with a jack and blocks of wood. Using the 14mm allen wrench, remove the bottom drain plug and allow the gear oil to drain. Be wary of getting it on yourself or clothes; it has a pungent (nauseating) smell, and one that tends to stick around for a day or 2. Make sure it drains into an oil pan, and you recycle the old oil. Remove the speedometer signal connector from the sensor on the cover. Next, loosen the 19mm nut and bolt holding the differential (through the bushing) to the chassis. Do not remove the bolt yet. Make sure your oil pan is under the differential. Next, remove the 14mm bolts holding the cover onto the differential. Once they are out and you break the cover free of the differential, remove the upper bolt and take the cover out. Check the internal components for obvious damage and the presence of excessive metal shavings.

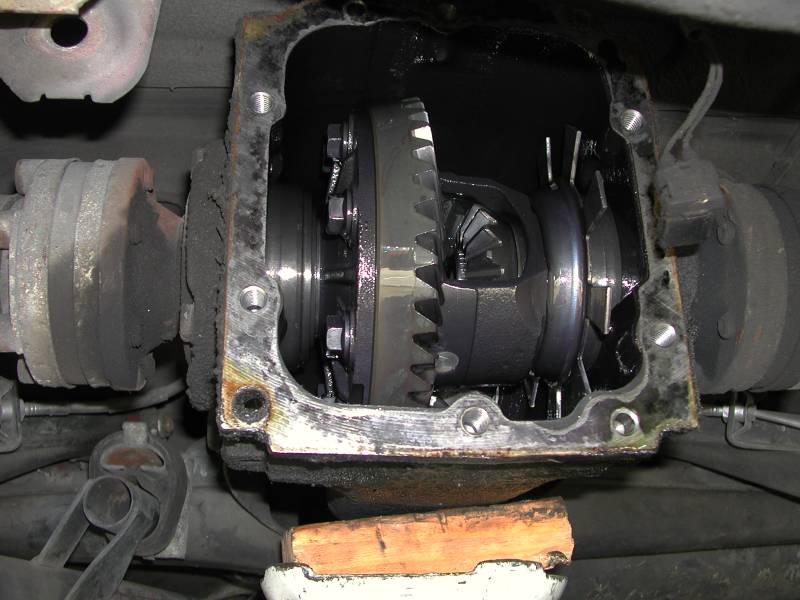
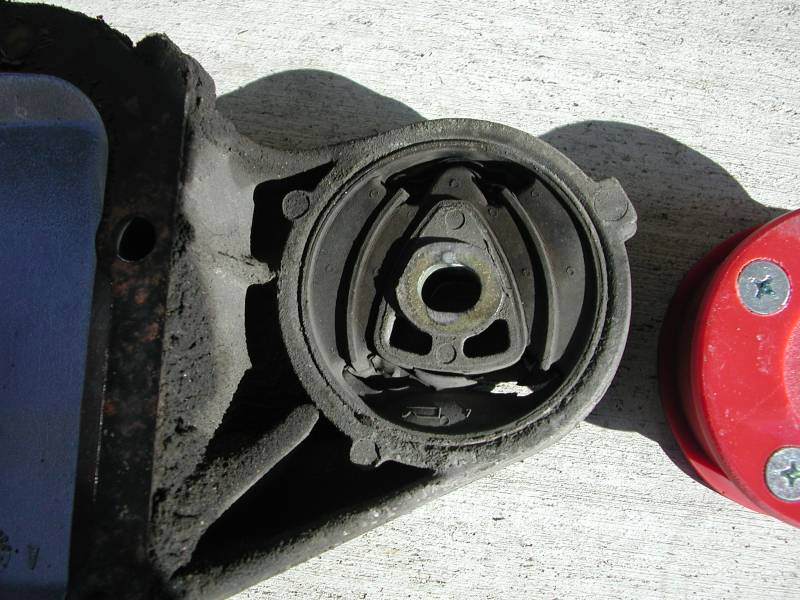
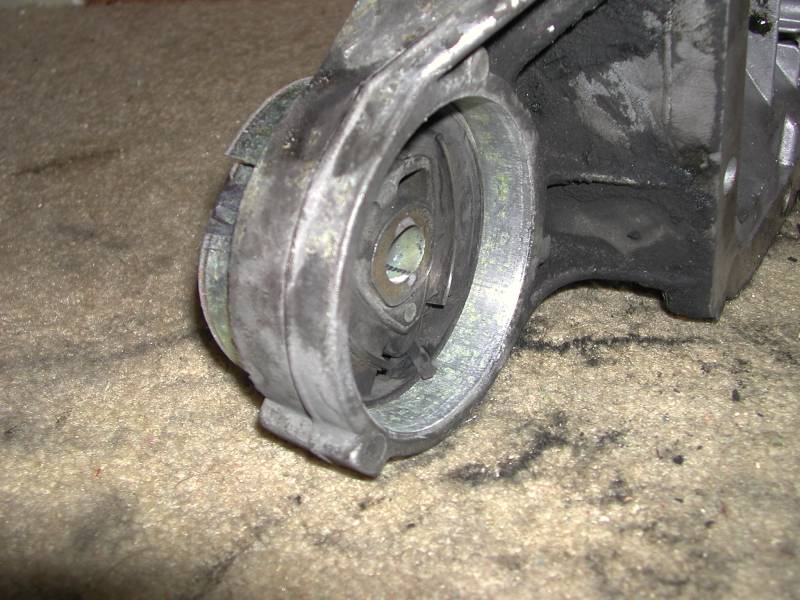
With the cover removed, take off the speed sending unit and allen plugs. Removal of the bushing is relatively simple. First, soak its perimeter with penetrating oil. Get an ordinary hack saw and loosen it so that the blade comes off. Insert the blade into the gap in the rubber bushing and reinstall the blade backwards in the saw. Now carefully cut the outer metal band of the bushing. Be careful not to damage the cover. Once it has been cut it should come out with one swing of the mallet. If it does not, use a flat blade screwdriver to bend the ring slightly, then smack it out. With everything out, thoroughly clean the cover and other components. A wire brush/wheel works well. Scrape off any pieces of the old gasket from the cover and differential as well.
Installtion of the new bushing should be far simpler than an OEM unit. Designs vary by vendor, but they should all be installable by-hand. Make sure that the cover has been cleaned of penetrating oil before putting in the new bushing. Threadlocker is highly recommended on designs similar to the one in this article.

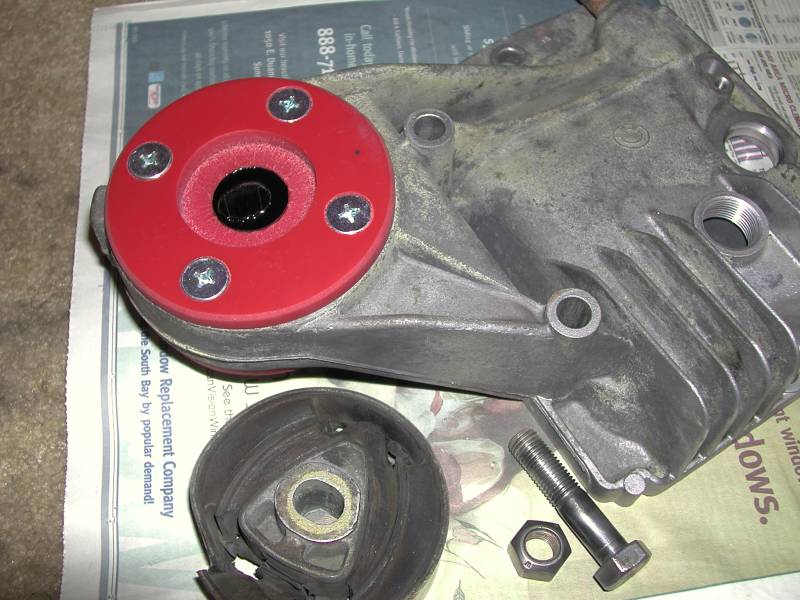
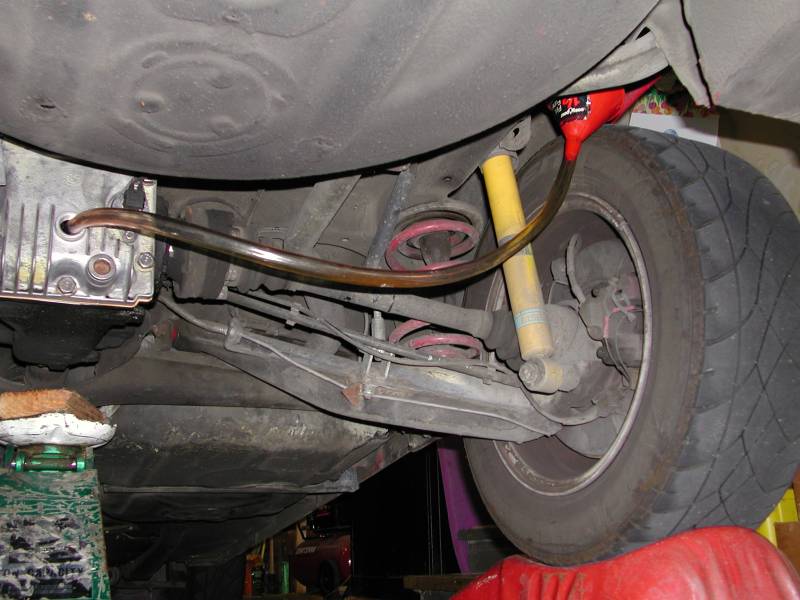
Reinstall the differential cover. You should first get the upper bolt inserted. The bushing may not fit as it is usually wider than the stock one. Use a screwdriver to pry the two mounting arms apart enough to squeeze the bushing in. Once it has been secured there, align the new gasket and install the cover bolts. Use a small amount of thread locker on them just prior to installation. Next, put the bottom drain plug in. Get a funnel and the 1.5m of 2cm ID tubing. You can refill the differential with the new lubricant as seen in the picture with the funnel and tubing. When done, put the fill plug back in. Once you are sure everything is properly torqued, reinstall the speedometer connector. Some thin wire should be used to fasten it in place, to ensure that it does not fall out.
Conclusions & Results
This straightforward procedure should eliminate any clunking originating from a failed differential bushing. It should not take more than 2 hours to do this properly.
DISCLAIMER: I take no responsibility (and thus I cannot be held responsible) for damages and/or injuries caused by attempting the procedures outlined on this site. The information provided is to be used at the reader's discretion and all necessary safety precautions requiring emplacement (mentioned or not) are the responsibility of the reader.